Showing posts with label layouts. Show all posts

Friday, July 7, 2017

All American Blog Hop

Welcome to the 
All American
Blog Hop

This hop is all about America and the things that make us great. Our projects hope to inspire you with our stars and stripes. I love the USA!

You should have arrived from Sue's blog.
If you need to start at the beginning please start at Connie Can Crop. 

This is a one day blog hop, but you have until Sunday to finish hopping and leaving your love for all of these talented crafters.


We have an awesome sponsor for this month!

One lucky winner will win a $21 gift certificate to Bugaboo Stamps.

Be sure to check out her shop online HERE
Visit her on facebook HERE

What do you need to do to win? Easy... become  a follower of each of the fabulous blogs in this hop and leave each of them a comment letting them know what you like best about their projects.


You will have until 10 pm Sunday to finish the hop and leave your comments.
Winners will be announced on Wednesday 7/19/17
Be sure to follow everyone and leave a comment along the way!

Now let's salute this great country!

My original project began with this incredible garland. (check!)

... Formed it to a wire frame. (check!) Hot-Glue-Gunned "everything"... (check!) 

Eek! I know it's supposed to be Star-Spangled and hot and all... But not a melted mess. Threw f-ed up project out. (check!)

Next up... um... Using my stash because I already wasted the expensive garland...


So I got this FANTASTIC stencil at Tuesday Morning. (Love that place!!!)

Gee... Those two on the left look exactly alike... because the ARE! And I didn't want to use a glitter/glimmer mist on a flag stencil. So... I went with a Red Wagon Mist (for the red... duh...).

But I'm not too fond of how the blue (Spectrum Noir) turned out... and certainly didn't think it would bleed through the THICK watercolor paper (used that because I totally love the texture!) but I stuck with it, because I knew it wouldn't bleed into the white stars later...
Totally know so you don't need to tell me that I really should use tape to tape down a stencil instead of scrap cardstock and my fingers or to block off areas... 
Looking around my stash room that's code for what should be my craftroom/mess room because EVERYONE piles EVERYTHING in there, and I can't ever find what I'm looking for!, I can't find white paint. or pens. or ink. or... or... And then I spotted it! A WHITE CHALK MARKER!!!! (Make sure you fill in all the points... not half-**sed like I did.)
The chalk marker tends to bleed a little bit...But it'll do. My paper has crisp flags!
I trimmed the flag (be sure your inks/paints are all dry before trimming! otherwise, they get all over your blade... YES... I have a massive mess to clean up! I adhered the flag (offset and skewed) onto my patriotic paper and added a vertical year. Now... I just have to get around to printing up this year's pics (we went to Knott's Berry Farm for the 4th) and scattering them around the page.

Now kindly hop on over to... um... (I'm the last hopper!) Connie (if you wanna start at the beginning again...) You can never get enough of a good thing! 

Here's our amazing line up in case you get lost:

Friday, September 9, 2016

A Year of Card Techniques - (September) Mixed Media

If you are here for the Smarty Pants Blog Hop, please go HERE (not available until 9pm PST!), or you can check out all of my hops for today (there's only two!). We'd I'd love to have you!
 
Welcome to...
 
 
It's month nine of our year-long adventure into different card-making techniques, folds and paper crafting products. We hope you got the chance to hop with us each month.

It's not to late to hop and comment to be entered into our prize drawing. If you missed any of the previous months,  you can click on the month to be taken directly to the start of that month's hop.
January HERE   February HERE   March HERE   April HERE   May HERE   June HERE   July HERE August HERE

This month, we are mixing it up a bit with the mixed media techniques and you won't want to miss the amazing and fun cards we've got for you today. We really love feedback, so please leave a comment on each of the blogs in today's hop. Each comment on the 12 hops throughout the year will be entered into a drawing for a $25 Blitsy.com or Stampin' Up gift certificate (Winner's Choice).

Now on with the projects.

I started with THIS:
Made a mini album, with a whole bunch of different stuff... took pictures... gave it to my "secret pal"... and when I went to put in pics and write about it, the rest of the pics were gone! I can't ask my "secret pal," because then it wouldn't be so "secret" right? Ugh!

And so... I'm going to post a past project... since I use a whole bunch of different media all the time anyway. And OH CRAP! It's not a card... but then again my original project wasn't either. Oh well. It's still great techniques you can use for cards...
If you know me... you know I don't take many pictures of myself or scrap them either. I'd rather not. But... I did enjoy this piece and fun playing with the major components of it. I distressed the crap out of every picture. NOTE: They are printed on textured cardstock!!!!
This lace? I made it myself! Velum... punched with Martha Stewart, stitched through with my machine, then dyed with Walnut stain and crinkled... then formed in the shape of a heart. Say it with me now... "Awwwww...!"
These are "ghost letters" with paint on the back. LOVE IT!!!!!
Thrown together, distressed a bunch and put in a book... totally my style! If you'd like to see the original post, please feel free to go HERE (It's back from 2012!)
 
Hope you enjoyed my little blast from the past...
 
Up next is Denise! Today's lineup in case you get "mixed up" (so you can be sure to visit everyone!):
 

Friday, May 13, 2016

Hat's Off! Blog Hop

If you are here for the Year of Card Techniques, please go HERE or do it all and check this post out, too!
Welcome to the
Thank you for joining us today as we celebrate Graduates everywhere! You should have arrived from Vicky. If not please go back to the beginning.  Your first stop on this special hop is Connie Can Crop. This is a one day blog hop and we appreciate your leaving a comment for all of these amazing crafters.

We have an awesome sponsor for this hop!

One lucky winner will win a $15.00 gift certificate for their shop! Be sure to check out their shop online HERE. Visit them on Facebook HERE.

What do you need to do to win? Easy... become a follower of each of the fabulous blogs in this hop and leave each of them a comment, letting them know what you like best about their projects. You will have until 10 pm Sunday to finish the hop and leave your comments. The winner will be announced on Wednesday 5/18/16 at Connie Can Crop.

Be sure to follow everyone and leave a comment along the way!

Lately, I seem to be doing more cards than anything. And that's a bummer. I have a wonderfully messy craftroom, with a gazillion supplies and things to do... but can't seem to find time to work on a page or two. (You know... because cards go together so much faster and easier.) So, floating through my scrapbooks which are totally NOT chronological. They're kinda all OVER the place... just like me! I came across this wonderful tribute to my nephew and of course my at the time 2yo, and all the other faces and places in there. I love this layout. It makes me smile... and remember good times.
He "graduated" from a Catholic elementary/middle school and moved on up to high school... We ate at... wait for it... Chuck E. Cheese! (I always try to include memorabilia from the occasions/places. Here is the program chopped to fit! and some fun things from C.E.C.)
I "fussy" cut and pop-dotted my nephew up in the middle of the page. Afterall, it WAS his day, right? And I had to give him a little more attention here...
And I surrounded it all with gold stars. That IS the ultimate sticker on a paper to have, right? or am I showing my age, here?
Stencils and chalks... some of my fave go-to's for titling. (and see the CLEAN C.E.C. plate that I cut stole cut up? EVERYTHING goes! when it comes to scrapbooking!)
And everyone that was there? Made it into a photo or two or maybe they didn't... I don't remember!
And here's the two-pager (together forever). Chalk and 1/4 cuts tie it all together. You can make almost anything coordinate by linking with chalks, or cross-putting the same papers!

And if you're interested in some of my previous work... Thousands a couple of years ago... I made these for a couple of graduation gifties! Check out the OLD post!

Up next is Sarah. She's sure to have something grad grand to graduate advance you to the next level!
Here's our line up in case you get lost:

Connie- http://conniecancrop.blogspot.com
Angela- Crazy3monkeys.blogspot.com
Alicia- http://goldengoddessdesigns.blogspot.com/
Kim- http://katydidcards.com

And don't forget to enter this month's challenge:
 
Connie Can Crop Challenge #46
Dads and Grads
due 11:59 P.M. Tuesday, May 31st.
Pacific Time
 

Sunday, January 10, 2016

I did a layout... It's About ME! (*gasp*) - (AKA:It'sFinally "Tomorrow", and I Promised my "DUH!" moment)

Howdy there! If you've come here today because I promised you something yesterday, then you're in luck, because I followed through! You came back to the right place, because I'm here! with lots of little goodies/nuggets to find.

I've slacked a lot in the scrapbooking department. I never scrapbook about myself. I mean NEVER. I don't really want to see pictures of myself. I don't really have that many pictures of myself... Like most of you, I'm the one with the camera (or the phone) out and I slink away when others have one out and/or put on a fake smiley over-exaggerated face or sometimes a funny face. Whatever the reason, I'm going to totally rationalize it, so you'll never win because I'm the one who always wins here the pics just don't get out there.

Let me give you just a tad of background... Many of you may have seen my post from yesterday. In that post, I was supposed to make a card. A "technique" card. An emboss-resist technique card. We were even given four (4... Count them... 1, 2, 3... 4!) different links to watch videos of people making... you guessed it! CARDS! Did I make one... Nope... Well, not at first anyway... Somehow, someway, I missed that key word. CARD. And so... I made a layout. New Year... New Me... Stepping out of my box/comfort zone... "Shheeee... I'll make a layout about ME! and my Journey... that I actually planned for and was going to start on January 4th, 2016." layout. Yep. I did. I worked hard on it.

I had issues with PicStitch (an app on my phone). I would choose 9 photos and then begin placing them. Placed the first one yay, me!... And *whoosh!* when I clicked back to place the next one... or edited one, ALL. of. the. other. pictures. were. gone. And I kept trying... You know how apps get, right? They have lots of teeny-tiny little gremlin bugs within them that are laughing at you every flippin' time something wrong happens until finally... you get it right. And finally, I got it right... or as close as I was going to get it.
If you look closely, you'll see... in each little box, I've added text or a drawing. I'm so proud of myself. (*pats "self" on back*) This is me. Untouched. Unfiltered. RAW. Okay... not that dramatic, and I didn't shoot in RAW, sorry if you photo-peeps mistook that... About my journey hopefully this one will stick and I'll actually finish it because I did invest money in myself... and the beginning of a scrapbook about myself. My children do deserve to know or remember more about me not that I haven't told them all of this stuff a thousand times or more, but one day... when I'm unable to tell the stories any more, there will be stories in my personal about me! scrapbook, for them to either read to me in my demented state... let's face it, we all might be there some day or to read and share it with other family members one day. (We all should do this... keep family histories alive!)

Anyway... I wanted them to see that each of us try things. And we have to work for what we want. And work... HARD!

And so... I began a layout to go with it. Working steadily... diligently... playing with Photoshop Elements because you just know the dang pic won't print in the right size without things getting cut off here and there, I know... I tried. It took me 3 printings to finally put it through Photoshop and resize the dang thing and getting it printed. Sorry... totally flaked on taking a screen shot of that. I know you were totally waiting to see a screen shot of Photoshop, huh? Yep. Thought so...

Since I was beginning my journey, what better paper to use than something similar to a notebook page, right? Right!
And if you read yesterday's post, you should hopefully remember we were doing the emboss-resist technique...

And then... I stamped the "2016" and "New Year New Me" stamps in clear embossing ink:

And sprinkled clear embossing powder ALL OVER IT!
And it came out like this kinds dingy and gross-looking and definitely not clear-looking...
That's what you get for using a pad that looks like this: (Clean your stamps as you go, people!) Yes... that's all kind of ink and glitter and... who the heck even knows!!??!!
I sponged one of my favorite Distress Inks all over it... Not so hot...
So, I tried spraying a mist of water on it...
No help.

And I moved on... to another sheet of paper. Don't fret! I did not waste that paper... I now use it as a mat for whatever I'm pouring embossing powder over... it still curves and funnels beautifully!!!

But in the meantime... SQUIRREL!!! Did I ever tell you I have just a touch of ADHD? Hmmm... well, combine that with a little OCD, and... you've got... ME! I was getting fed up with trying to find inks because you know that since the holidays and all came directly after the handy dandy hubs completed the new craftroom and I haven't had time to organize it... STILL! Doing all this resist stuff requires INK. And so... in the midst of all this layout-making, I built this cart it was so hard, I still feel like I'm sweating from the workout, moved this whole big box of inks into the cart, and totally felt better. Breathe...
Back to my layout-making... and this time since the last stamp pad obviously had residual ink from uncleaned stamps, I went with the "tinted" dries-clear embossing ink, which looked like THIS:

yeah I know... looks much worse than the first stamp pad, but I was willing to try. Guess I'm going to have to go SHOPPING for some new embossing ink pads, huh. What a... BUMMER! Ha!
and stamped the same two stamps on the new paper...
and applied my heat-embossing tool to it, then used bright sunshine-y yellow on it to make it more positive and hopeful.
Wasn't quite happy with it... so I misted it with water. After misting it with water, it tore just a tad which is totally what I'd intended but not intended to do. You follow me? Me neither! Notebooks need to look worn-ish, right?
On some YouTuber's video, somewhere... someone had said to mist the bottom as well as the top, so that it dries more evenly and doesn't curl. Well... you see how that all worked out...
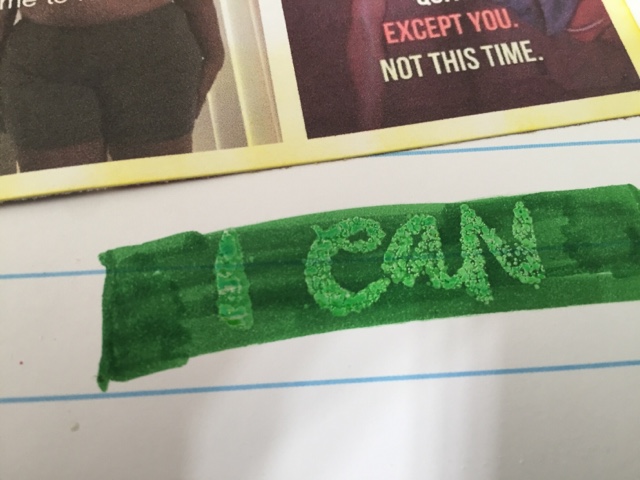
On to my next stamp... "I CAN" because I can! Because I really truly can! because I'm really trying to have faith in myself that this time is the time and I will succeed because... Did you guess it? I CAN! I brushed it with some green is for "GO!", don't you know? watercolor markers (see the beading on top of the embossing?),
and brushed it off with a wipe.
I did a bit of doodling and some writing... and called it a day! YAY! ME!!!
complete finished layout... (please note... AHEAD OF SCHEDULE!)
And then... I went to post it for the Card Technique Challenge. remember... if you're following this, for some oddball reason, I hadn't been seeing/reading the CARD word As I was reading the pasting job of the "write-up" because some of us don't use the write-ups word for word and we tweak them as we see fit, the word "CARD" kept jumping out at me!!!! Whole. E. Shhhhh... ute! No flippin' way! I was WAY ahead of the game for once and had to start all. over. again. (See yesterday's post to see what I ended up doing as a last-minute card. I actually think it turned out pretty well. And then... of course I think... Otherwise I wouldn't be alive, right? Right.

By the way... In case you missed it... the above paragraph was my totally "DUH!" moment...
----------------------------------------------------

The back story behind the layout?

Full honesty here, folks. No jokes. Some of us have struggled most of our lives with weight. Whether we're too heavy (like me) or too light (like lots of other people). If you happen to have never had to deal with either of these problems, in ANY extreme, please consider yourself very lucky. Have a heart, since there's no way you could possibly understand, and do not judge.

So... in my goal to be healthier (this started WAY before "New Year Resolution" stuff...), I committed to a 90-Day Shred Challenge. I have a friend who kinda talked me into it... who is an "It Works!" distributor. I've watched her shrink and be much healthier. And I know her... so, I've actually been watching it work for her. I'd already cut way back on my portion sizes, added more salads, but down (pretty much cut out) my beloved Coca-Cola, and upped my consumption of water. On my own, I'd already lost 10 pounds. But I had (still have) a lot more to go. Enter my friend, who offered me support and just to try the 90-day challenge... I said yes.

I'm here, 5 days after the challenge started. I have not added exercise yet, but yet... I'm down 4 more pounds, feeling fully satisfied, and not craving a thing! Yay me! and just so you know... writing all this about myself and doing a layout of ME is a complete challenge on it's own. Had to up my game and step out of the "self" box.

Please feel free to share your struggle(s), challenge(s) and even your own "DUH!" moment(s) in the comment section. I'd love to hear from you and get to know YOU a little better, too!

Friday, May 25, 2012

Paper Hoarders Memorial Day Challenge

Good Morning!!!! Yes! It's been a while. And I'm back to show you the layout I made commemorating Memorial Day...

First, a bit of history. What? No... you didn't get enough of that in high school. History continues on... Memorial Day is for ALL of our fallen soldiers, who have fought for our country and died while doing it. There is not enough we could offer them, but we try... we give them our thanks and honor them on this day.

Our country is based on history, and we were asked to do a project for Memorial Day. Um... that's really hard for me. Difficult, I say. Well, because I don't (personally) know of anyone who sacrificed their lives for our country. I haven't known the men and women who have died for us.

So... at first... I thought I'd make a tote. Tote made... I was going to sponge-paint a flag on it and use it forever (like the stamps!) for groceries and such... then I remembered... OMGOSH! This is for Paper Hoarders... What the heck does a pillowcase tote have to do with paper. Ok... scrap that.

Then... I got the inclination to do dog tags. I had these really cool vellum tags that have been just sitting here... and with some vellum labels, I could print something? Awesome. So... Recollections (from Michaels) has this really cool shimmery navy blue cardstock that I used for my background.

And then I began searching the internet for awesome photos of soldiers in the field, or even commemorative photos of soldiers. I intended to put a pic in each star on my blue background, but... I came across this photo. And I love it. It basically says it all.

I'm not overly religious, but... I do honor our Pledge (of Allegiance). I believe that no matter what other people believe, our Founding Fathers began this nation under these beliefs. This part of history is part of US, as a Nation. And whether you believe in God or another higher power, or nothing at all, just by stating it... we are together as a Nation, identifying with our history. And these people, the men and women who have died defending our country and/or those who we were trying to protect, as well... Deserve to be honored in our country's history.

And so... the dog tags state:  (White) - "In God We Trust... We also trust those, who have given their everything, their lives. To our soldiers who offered us so much..." and (Red) "In Memoriam... to honor every soldier who has fallen... for our Nation... One Nation Under God".

I just love blues, reds, and whites. They are awesome together. And I just HAD to use the Recollections white cardstock, that's flecked with red and blue. How fitting for this. I distressed the photo, to show the wear each soldier has taken on... ultimately... (and yes... I finally got my Distrezz-It-All...)

I hope you like it, and remember it. If you'd like to see the other DT members' projects (they're AWESOME!), just go visit Tanya's blog and give everyone a little love. They work hard for it. Oh! and don't forget to leave a comment here... Have a wonderful Memorial Weekend, no matter how you choose to celebrate (I'll be walking a pool deck... working! lol!)

Thursday, February 23, 2012

Paper Hoarders Design Team Challenge (Guest Designer) - Love/Anniversary Layout

Howdy there! Omgosh! It's been over two months. I know I've been busy, but... yeah. I've been floating around the internet, on Facebook, and my newfound time waster addiction, Pinterest!  So many ideas and so little time... Time has flown!  Then, there's the usual busy-family-kids-everyday-life things. And I got taken away... overwhelmed... You know...

But, Tanya, at Paper Hoarders, pulled me outta my funk and let me be a guest designer. Um... because of the shortened week, I'm a day off. I thought today was 2/22... and I was gonna be on time and everything! But... as we you can see, today is 2/23!!!! And so, I'm posting it a bit late. Silly me! It was done and everything! I was just taking my time loading it all and writing about it!

Alrighty. Let's get down to buswhacks! First... I don't have very many pics of me. And I most certainly don't have very many pics of me and the hubster. But... since Photoshop wasn't working for me all this week (it wouldn't save, wouldn't print the right size, and was just plain acting wonky [yes, that's a word... at least to me, it is!]), I switched to my trusty-ol' Fuji program and found THESE pics you see posted here.

I decided to do something a little different. I was looking for that edgy-distressed-type look... so... I printed them (via my own printer) on pearlescent textured paper, to get a silvery sheen. I love the way the pics turned out!!!! (Can YOU see the texture and the sheen?)

And me? I love playing with textures and mediums of all sorts. So... I even made my own vellum lace. I border-punched two different strips of vellum (two different punches - Fiskars Threading Water and Martha Stewart Embossed Snowflakes), one was white, and the other ecru. I sewed them together with a navy thread (to accentuate the background paper), crumpled them all up really tight!!!, sprayed them with Walnut Ink Stain, then misted with water, mashed them around a bit more... and

here's the REALLY good part! Hey! you know how you "lose" things or "forget" you have things, and then you find them, and they're all dried up (we're talking baby wipes I bought for my stamps... years... ago...) and you think that the only way you can do something with them is to either throw them away or re-moisten them and hope for the best? (Whew! THAT was a long sentence!!! My English teachers wouldn't be too happy with that!) Um, yeah... Guess what? I used those old, dried-out, newly found baby wipes to blend the stain and water and move it on down to semi-saturate my homemade vellum lace and "squeegee" off the remaining amount of stain. Woohoo! {flips hair over the shoulder, because I know I'm good now!}

And so... I adhered my pics to this awesome blue-ish toned and distressed paper with flourishes, painted a little Robin's Egg Blue around the bottom pic, cut the strips of the vellum lace (so it would form better to the curves of the heart I was gonna adhere it to), and adhered it all around the pics in the shape of a heart.

The Heidi Swapp Ghost Letters (LOVE) are painted Robin's Egg Blue on the back, then adhered with (get this) silicone glue, to add dimension, since pop dots would have showed through. I love the use of silicone glue (aka: silicone caulking - found in your local hardware store) to add a "ghostly" dimension. It's awesome!

And then, as a finishing touch, I stamped "forever" (a Studio G stamp) in the bottom left corner. I was going to add more... but... thought with all the pics (yes, I used FOUR of the same-type pose... because... well, we can never seem to get them right. but the point is... we do so many other things GREAT together!), that it was busy enough. Simplicity is key.

Anywho... I hope you like it. I had a blast making it. And thank you, Paper Hoarders for letting me join in again. I missed you so!

Tomorrow is Design Team day, and YOU can join in the challenge, too! Just go on over to Tanya's Blog and check out each of the DT members. Comment on them... please!!!! And you can link to your challenge result.

Oh yeah... the challenge was... Um... Love/Anniversary, using NON-traditional colors (no red, pink, or silver). I think I made it! Woohoo! (and this makes me first layout of the year! um... I've never even scrapped a pic of me and the hubster, so... that's a whole heck of a lot of challenges for me today!)

oh, and... PLEASE! don't forget to leave a comment for me, too! I'd love to know what YOU think about it!