Friday, March 11, 2016

Once Upon a Time Blog Hop

If you are here for the A Year of Card Techniques - (March) Inlaid Diecutting... please go HERE! (or... scroll down and check out all my posts for the day! I'm kinda great!)

Welcome to the
Once Upon a Time Blog Hop!

We are so delighted you are joining us in a land far, far away!! We will be showcasing projects featuring only the finest princesses in the land! So come be inspired by our magical talents!
Connie Can Crop is the first stop in this hop. This is a one day blog hop and we appreciate your leaving a comment for all of these amazing crafters.

We have an awesome sponsor for this hop!
One lucky winner will win a $20 gift card to shop their awesome files in their shop! Be sure to check out their shop online HERE. AND! Visit them on Facebook HERE. AND! Follow their blog HERE for freebies and inspiration!

What do you need to do to win? Easy... become a follower of each of the fabulous blogs in this hop and leave each of them a comment, letting them know what you like best about their projects.
You will have until 10 pm Sunday to finish the hop and leave your comments. The WINNER will be announced on Wednesday 3/16/16 at Connie Can Crop.

Be sure to follow everyone and leave a comment along the way!

So, between you and me... Haven't you ever wanted a do-over? I know I have... And going back through my scrapbooks, I see things coming off the page (old crappy glue or adhesive... You know what I mean... before we knew there was better?), definitely dysfunctional style... That "what the hex was I thinking when I put that page together???? and other scrapbooking woes. Whelpers... ME TOO!!!! So this two-page layout from a quincenera was crying, "HELP ME... PLEASE!" I don't believe it was an actual "please" but more of a demand. And so... I obliged.
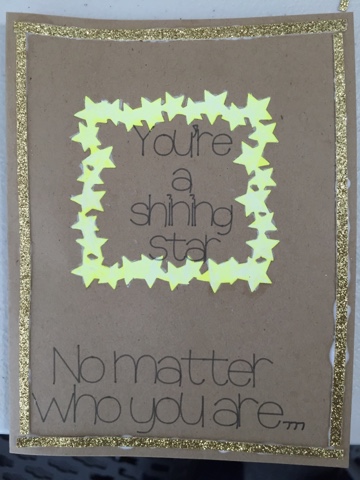
You can't really see it... but I added a Wink of Stella on the white borders and scrolls... Glamming it up and making it all even gaudier than it already was...
Here's a better view. This is interactive. (You can't see it and the pics came out WAY to blurry to even bother posting, because you might wonder if some of my pics were taken by a child, but the picture frame [and photo] are a mini-accordion album and fold out to reveal many more photos.) What can I say? I try to make the most out of a page!
This is Aurora... But I made her a tad darker... to be more like the Quince Princess (the Birthday Girl!) and her doll. I just couldn't make curly hair to fit... so sue me.
A bit more detailed view... I just love Stickles!
And here's a whole 'nother page (the right side) completed. This was a long time ago... but I believe after my mini-maintenance, the pages will last a lot longer. Thank goodness I discovered better GLUE!
 
Sometimes, you just have to take a little breather and fix a couple of things... Life lasts much longer this way and breathing is easier, Don'tchya think?
 
Just a note... And oh my! Let me tell you how much easier this all was since the FIRST time I created it... Cricut has come such a long way! And the cutting is even better than ever!!!! Makes me maybe wanna "fix" some more things!!!!
 
Up next is Veronica! (Isn't that just a royal-sounding name? I think so!)
Here's our line up in case you get lost or need to find your way back to another land...
  • Connie- http://conniecancrop.blogspot.com
  • Pam - http://lovebugcreations3.blogspot.com
  • Janet- http://janetscreativeworld.blogspot.com
  • Alicia- http://goldengoddessdesigns.blogspot.com
  • Kim - http://katydidcards.com
  • Miranda - www.nanasscrapspot.com 
  • Angela - http://www.crazy3monkeys.blogspot.com
  • Tricia - http://mysticalcardcreations.blogspot.com
  • Beth~ http://thecraftyscrapyard.blogspot.com
  • Sarah ~ www.sarahbiswabic.blogspot.com

  • A Year of Card Techniques - (March) Inlaid Diecutting


    If you are here for the Once Upon a Time Blog Hop... please go HERE! (or... scroll up and check out all my posts for the day! I'm kinda great!)
    http://scrapsbygracie.blogspot.com/2015/12/a-year-of-card-techniques-march-blog-hop.html

    It's month three of our year long adventure into different card-making techniques,
    folds and paper crafting products. We hope you got the chance to hop with us in January for the emboss resist technique and in February for ink layering. It's not to late to hop and comment.
    If you missed January's hop, you can still hop and comment by starting HERE.
    If you missed February's hop, you can still hop and comment by starting HERE.

    This month we will be focusing on inlaid die-cutting and you won't want to miss the awesome cards we've got for you today. We really love feedback so please leave a comment on each of the
    blogs in today's hop. Each comment on the 12 hops throughout the year will be entered into a drawing for a $25 Blitsy.com gift certificate.

    Now on with the projects. (If you'd like to see the YouTube videos that may may not have inspired me/us... Check them out here:
    Ok. I'm letting you know RIGHT now... this one was a bit harder for me... First of all... I don't own many dies. (I'm kind of an electronic kinda gal...) So here's what I had to work with:
     
    And believe it or not, I picked one of the more intricate (The Butterfly) piece first. Got completely frustrated with all those hecka tiny pieces (you'll see below) and gave up for some simplicity.
     
    And so... I chose the star frame. Easy? Not so much.
    I went with the above colors...
    And tried to run it through my Cuttlebug. Man, I sure wish I had some of that "Post-It" tape... Probably wouldn't have had to do so many tries and waste so much paper! Um... It moves!!!
    So after all the sandwiching and passing, this is what I ended up with...
    And all these itty bitty pieces...
    But, today was a day I really felt like getting all gluey and peeling glue off my fingers. We all need to revert back to being a child once in a while...
    And you know you gotta smoosh it around with your finger... Because who DOESN'T like peeling dried glue off their hands? I L-O-V-E it!
    Piecing it together... It really is more tedious than it looks...
    Like a puzzle... Which way does it go? Yes... I tried several times...
    See that itty bitty teeny tiny piece on my fingertip? Yep. I had to try to get it into one of the equally small holes... THE RIGHT WAY! and see...? I'm still letting my finger(s) dry, so I can peel the glue...
    THAT's the hole I had to fit it in...
    And... just a hint... if you use CRAFT cardstock, run/pass it through several times, otherwise you'll get one of these bits that just isn't cut all the way through. Try that! on for size... major frustration and re-doing...
    And some edges stick up... Ugh... Might as well get out my faves... (see below!)
    Clear plastic and a BRAYER to the rescue! That's right... roll it all down really tight!
    And then we have the above... And that glue still needed to dry...
    And um... Be sure you put either some plastic between the layers or something, because otherwise, it might stick together? Uh... Yeah... It's a no-brainer. And I didn't have the brain that day...
    So... I wanted to have my Cricut write inside my card... Only...
    Design Space wasn't being friendly with the line-spacing... Ugh.
    But, I changed it and got it... And then (as I've shown several times before...) I moved it to where I wanted it on the mat (which I had the physical mat loaded with the card... brayer-ed on, of course!).
    Note: If you're not sure if it's going to "write" in the "right" place, use the stylus, and it will lightly emboss the path... If that's right, just do it again. Only this time with a pen... Yep!
    Watch that baby roll!!!!!
    And see? Gorgeous... But not quite enough... See the Wink of Stella I added?
    Awww... Beautious! But still... not enough...
    So... Strips of glitter card stock were added and brayer-down. If you don't know these lyrics... and they're not humming through your head yet, ask an "older" person... It's from the '70's!

    Hope you enjoyed my simplistic card! I'll try it again... after I get some less-complicated dies. It really is cool!

    Up next is Jearise! Check her work out and see what types on in-laying she did! This is pretty incredible!

    Here's today's line-up in case you get lost along the way
    Theresa
    Lisa
    Jearise
    Kim
    Claudia
    Denise
    Debbie
    Sharon

    Tuesday, March 8, 2016

    30th Anniversary of Connie's Sweet 16 Birthday Blog Hop


    Welcome to the 
    30th Anniversary of 
    Connie's Sweet 16 Birthday Blog Hop

    We are so delighted you are joining us to celebrate Connie's Birthday!! We will be showcasing projects centered around, you guessed it, birthdays! 

     Connie Can Crop is the first stop in this hop. This is a one day blog hop and we appreciate your leaving a comment for all of these amazing crafters.

    We have several awesome sponsors for this hop! 
    And a freebie for everyone at the end!
    One lucky winner will win 2 free files from Miss Kate Cuttables.
     
    One lucky winner will win these awesome goodies from Connie's Crafty Cart.
     
    And
    Everyone can win this cute Birthday cut file for free. After you hop and leave a comment on all the blogs, send Connie a message on FB or via email conniecancrop@yahoo.com and she will send you the Free SVG from Paper Crafting World.
    What do you need to do to win? Easy... become  a follower of each of the fabulous blogs in this hop and leave each of them a comment letting them know what you like best about their projects.

    You will have until 10 pm Wednesday to finish the hop and leave your comments.

    Winner will be announced on Wednesday 3/16/16 at Connie Can Crop.

    Be sure to follow everyone and leave a comment along the way!
      
    Did you know...? Connie shares her birthday month and Zodiac sign with Girl Scouts of America!

    And all most of us Girl Scouts are out there selling cookies during this time of year, whether we are at a booth or even door-to-door. And... we get "marketing tools" to help us sell and reach our goals. (I say "we" because you know it's not just the girls... Their parents are out there, right along with them. What kind of parents would we be if we let our kids roam the streets... alone?
    So... I picked up these little gems at the Girl Scout Store. Not "priceless..." with the total cost for 3 discs and 6 overly large cookie boxes being $50. YIKES!
    And the girls used them. Cute, huh? But... it just wasn't quite enough for the big birthday coming up... and it didn't quite attract enough attention. So... I needed to bling them up!

    And I did... only that stuff got absolutely EVERYWHERE. In their hair, in their faces, in their eyes... OUCH!, all over the car... You get the picture.
    So, I sealed all that glitter so the above incidences never happen again with Mod Podge. Please do not call it "Modge Podge." There is no "ge" at the end of the "Mod." Just a teeny weeny pet peeve of mine... and lots of other crafters and non crafters alike.
    And voila! Here we have 3 2-sided discs, each with a glitter-surrounded cookie in the middle. Makes ya want one, huh? I also had punched two holes on each side and threaded ribbon for reversible handles, so the girls wouldn't get hands all over the cardboard. I mean... who the heck likes paper cuts? They happen, you know...
    Then to make a banner... I broke out my We R Memory Keepers Banner Punchboard. FYI... the only thing you punch on that is the holes to thread the line through... So why the heck they call it a "punch board" I will never EVER know. and some white and green cardstock. Sliced it in half... and went to town.
    I totally love how it all fits in there and the magnets that hold the paper in, once the top part is folded down. AWESOME!
    And that it cuts THREE different shapes! Woohoo! Easy! (I only used two, though... the Pendant [triangular] and the Flag [the one above... that's the bottom. The top is squared.].
    The punch... can punch 2-3 sheets of cardstock at time! Makes it all a bit easier!
    Don't ask... the girls picked "pink glitter" for the lettering. Totally wouldn't be my first choice. Or my last, either.
    Here's pink on green... Ugh. Ugh.
    And pink on white. Did I ever tell any of you... I really REALLY don't like pink?
     
    Well... I only did two letters. The banner alternates green and white (Girl Scout colors, yo!) and pendant and flag. It will spell out H-A-P-P-Y B-D-AY G-S-A! (Girls Scouts America!), but... I figured the girls need to do some decoration-making. Afterall, it IS supposed to be girl-led. And they we will be wearing some cutesie party hats and other fun stuff... Nonetheless, I'm hoping that since we do have a booth on the GSA b-day... Our girls will sell LOTS of cookies!
     
    And btw by the way, in case you don't know that by now because... some people (like my husband) just don't know... what did I actually do for Connie? Well... I'm hoping she's having a grand ole time visiting sunny Florida and she can tell me how very different it is from sunny Southern California when she comes back. But... she did ask me for the Frogger card I made earlier this month. And me being "almost" the same age as her yes... I'm the younger version! lol!, I mailed it to her! Woohoo! Enjoy the 80's, Connie! Have a brilliant birthday and let your Sweet 16 Self Rock On!
     
     Up next is Holli! Give her a "Holla!!!!"