Showing posts with label stamping. Show all posts

Friday, April 21, 2017

A Year of Card Techniques - (April - Stamp Set Showdown)


Welcome to A Year of Card Techniques Blog Hop where each month we’ll feature a different card technique. We’ve assembled a team of fabulous card makers who range from new to advanced, so you’ll see a wide variety of cards and ideas.
The month of April features a Showdown! A stamp set showdown, that is. We’re using one stamp set in various ways. Let’s face it, stamp sets are getting more and more expensive; so we’re here to inspire you by demonstrating how to s-t-r-e-t-c-h those stamps!
If you would like to check out our past technique hops, you can do that here:
We have an amazing sponsor this month, Wilma Payne of Fun Stamper's Journey:
Please take a moment to check out the great products Fun Stampers Journey has to offer. To visit Wilma's blog, click here and her Facebook Group here.
And the awesome prize this month is:

We really appreciate feedback, so please leave a comment on each of the blogs in the hop today. One winner will be chosen from all comments on the hop as of April 28, 2017. The winner will be announced in our May hop; so be sure to come back next month.
You should have arrived here from Amanda. If you're visiting here first, you might want to start at the beginning so you don't miss a thing and increase your chances of winning by leaving a comment on each blog.

Off we are! I looked at my bookcase to find these...
rather dismal... don't ya think? But... I thought I'd try out a set anyway. And, since Spring is Sprung... I picked...
Super cute, right? And I mixed and matched things up a bit to get these:
Then... I went to slice them up cut them to card-size and...
Yep this happened...
So I made the most out of them and decided to add a lot of **SPARKLE**! sparkle is like magic. It tends to take away your errors. didn't you know?
See? The sparkly even shows up on photos!!! Woohoo! At least something went right this time...
After coloring... I've got all these card tops! I'm way ahead of the game, now!

And just so you know... I'm probably going to give up coloring for a bit. My inner kindergartner doesn't seem to want to come out to play very well. I'm still having a bit of trouble with blending (and staying in the lines) and cutting them correctly, etc. I haven't played with my Cricut in awhile... so I believe she'll be waiting for me.
Now you’re off to visit with Jodie. Hope you had fun and thanks for stopping by. See you next month with another technique!
Here’s the full line-up in case you get lost:

Friday, April 7, 2017

Hippity Hoppity Blog Hop


Welcome to the 
Hippity Hoppity Blog Hop

"Here comes Peter Cottontail
Hoppin' down the bunny trail
Hippity hoppity, Easter's on its way!"
Thanks for joining us for a fun hop full of Easter Bunny 
inspired projects!!
Wishing you all a blessed Easter with your family and friends!!


You should have arrived from Rebecca!
If you just happened upon this spectacular hop, Connie Can Crop is the first stop in this hop. 

This is a one day blog hop, but you have until Sunday to finish hopping and leaving your comments for all of these amazing crafters.


We have an awesome sponsor for this month!
One lucky winner will get a $20 gift certificate to shop Paper Crafting World!


Be sure to check out their shop online HERE
Visit them on facebook HERE
Follow their blog HERE for freebies and inspiration!


What do you need to do to win? Easy... become  a follower of each of the fabulous blogs in this hop and leave each of them a comment letting them know what you like best about their projects.

You will have until 10 pm Sunday to finish the hop and leave your comments.
Winners will be announced on Wednesday 4/12/17
at Connie Can Crop.
Be sure to follow everyone and leave a comment along the way!

And so... I decided to try "coloring" again! This was supposed to be "quick." Apparently, that is not a word my mind or fingers seem to understand.
I started off with a pigment stamped piece. maybe that was my problem...
Colored in some dark (bold) orange from my seldom used Spectrum Noir(s)...
Tried to add some softer orange... because I thought I had this "blending" thing figured out...
And I "blended" it. Nope. Not working for me...
So I added more bold orange to the mix...
It's the best thing I got... You don't really want to know how many times I REALLY tried this...
These are the gorgeous colors I used in case you don't want to make the same mistake want to replicate my masterpiece.
(Looks like someone was sneaking into my secret pal's goodies!)
I attached it all to this little basket... 
Just so you know... (because I know and thought you might want to as well..) I accidentally must've deleted the pic with the tag attached to the basket... 
 Now... Hop on over to Marji!

Here's our amazing line up in case you get lost:

Friday, April 8, 2016

Bee Happy Blog Hop

Welcome...
http://conniecancrop.blogspot.com/
to the Bee Happy Blog Hop! We are buzzing with joy!! It's Spring; the birds are singing, and the bees are buzzing! So happy you decided to join us in this fun bee themed blog hop today!
 
You should have buzzed on over from Pam's bee hive. If not, the Queen Bee is Connie Can Crop, and she is the first stop in this hop. This is a one day blog hop, and we appreciate your leaving a comment for all of these amazing crafters.
 
We have an awesome sponsor for this hop!
One lucky winner will win their choice of 3 their awesome files in their shop!
Be sure to check out their shop online HERE;
Visit them on facebook HERE;
Follow their blog HERE for inspiration!
 
What do you need to do to win? Easy... become a follower of each of the fabulous blogs in this hop, and leave each of them a comment, letting them know what you like best about their projects. You will have until 10 pm Sunday (4/10/2016) to finish the hop and leave your comments. The Winner will be announced on Wednesday (4/20/16) at Connie Can Crop. Be sure to follow everyone and leave a comment along the way!
 
I really need to up my card stash. I send cards out all the time... and I used to have a pretty big stash. Then something happened. My take got bigger than my make! Did you follow that? In plain English because my other English was more plain than this, apparently, all the stuff I've been making, haven't been enough for the taking. Did you get it this time? And so... it appears that most of my blog hops and challenges and pretty much mostly everything for awhile just might be cards.
 
I needed a pick-me-up type of card for a dear friend who was in a car accident. I have a sympathy card, but um... not quite appropriate. I had an ouchie card... again, not quite appropriate. I'm not very appropriate, apparently. I decided to put a bee in her bonnet and get into some of her bee's-ness (haha, get it?) and make her bee happy! hahahaha! I love all the plays this "bee" word can make!
I started with a cute little dollar-store stamp, in Walnut Stain Distress Ink - Tim Holtz... I LOVE YOU! I wanted it a little "fuzzy" (because that's how bees are, ya know...) and not so crisp. The Distress Inks are perfect for this. I filled in the white body parts with Zig glue... sprinkled on some Martha flock (in a yellow daffodil) and let 'er rest a bit. Then tapped off the excess flocking. didn't need FUZZ everywhere... 
If you read me you know, not "me" per se, but at least my blog, then you may have read several other posts where I used a clear or colored Crystal Lacquer. Whelp! I did it again! I put that light blue pastel Crystal Lacquer in the wings, being extremely careful not to put it on the lines. Patting self on back. Good job, Lisa!!!
Ok... this pic's not so hot. I'm having close-up difficulties with the iPhone 6 (in case you want to give me FREE advice on better techniques to use with said phone) and I'm really just too lazy to go get my "real" camera, take pics, download said pics to the computer, upload said pics to my blog... See? Way too much work. I'm tired already. Anyway... the pic is supposed to bee the stamped and embellished image with further embellishment. Can you tell what I did? Yup! I sprinkled Pixie Dust on the wings. But they didn't fly... and neither did I. But it really does look good, in person...
I don't hate my writing. I used my writing skills  and wrote out the word "Bee" on the front of the card in more Zig glue and sprinkled more flocking. I was impatient and simultaneously glued and flocked the word "HAPPY" in HUMONGOUS letter on the inside and neglected to let it dry enough...
I inked up the edges with another Distress Ink (did I tell you I love Tim Holtz?). But it still wasn't enough. After reviewing several of my posts, I'm starting to think I'm a Children's Lit author with a sing-songy voice and repetitive phrases... kinda like when there is a chorus or trademark...
And so... since the Pixie Dust didn't seem to work...I made my bees fly! (with a little penwork...

My advice? Let the outside dry before working on the inside. Now, I'll have to slice off the cover and attach it to another card. Ugh. I hope you like it anyway. I know my friend will, when she gets it! I just want her to "Bee Happy"! (and YOU, too!)

Up next is Sarah... buzz by her blog and see what kind of bee-you-tiful stuff she's got goin' on!

Here's our line up in case you get lost:

Friday, February 12, 2016

A Year of Card Techniques - (February) Ink Layering

http://scrapsbygracie.blogspot.com/2015/12/a-year-of-card-techniques-february-blog.html
It's month two of our year long adventure into different card-making techniques,
folds and paper crafting products. Join us the second Saturday of each month in 2016
for a new hop filled with great cards.

This month we will be focusing on ink layering techniques and OMGosh have we got
some cool cards for you. We really love feedback so please leave a comment on each of the
blogs in today's hop. Each comment on the 12 hops throughout the year will be entered
into a prize drawing for a $25 Blitsy.com gift certificate at the end of the year.

Don't worry, if you missed January's hop, you can still hop and comment by starting HERE.

Now on with the projects.

So... I had a textured base, that I thought would look good, to go plaid, via stripes. Did you follow all that? Because I'm not so sure I did, on the read back. But... if you read on, you might get it.
Here's the stripes the rubber stamp, not the full-blown mess in the background...
So I stamped them horizontally with Versamark Cloud White.
Then I went vertical... and dried it a tad.
Here's the dried version. I can see it? Can you?
Then I tried like the vids I watched and stamped over... in a dye ink red and a black.
That plaid didn't turn out the way I was hoping, so... My 11-yo wanted to help. I let her choose the background, the colors, etc.
And I rolled with it... FYI, DO NOT ROLL BACK ON A ROLLER STAMP, you'll end up with duplicate printing that doesn't look so hot.
Then I stamped over it (with dye inks again) in a bunch of different shades and tones of red.
The 11yo wanted a cutesy stamp, too... And so I did and I added a message... because I'm going to give it to the 11yo.
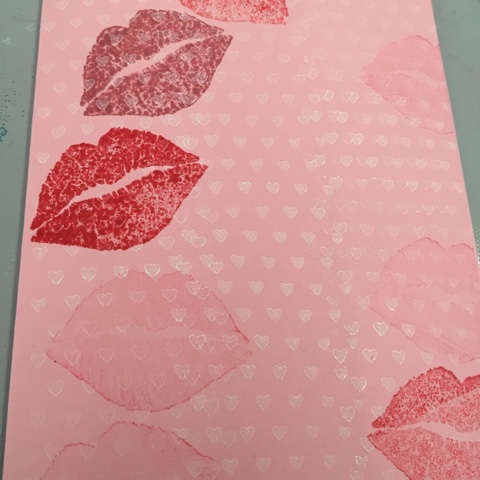
But... I wasn't quite happy with it, so I went back to the plaid. And I stamped white lips don't take that as an anti-PC remark... I really did use white ink. But you can't see them...
And then I layered juicy red lips on top (dye ink again!). If you look SUPER close, you can see the red and black stripes overlapping the white and becoming a different hue...
So... I'm not quite sure I like it. I would totally play with this technique more. It's kinda fun! But this card, I'll give to the hubster (this Sunday...). It'll all be good. He won't notice anything. Have a HAPPY VALENTINE'S DAY!

I'm the tail-end today. But... feel free to see if there's any blogs you might've missed, or if you'd like to re-review, start back at the top with Theresa (our host!).

And here's the, in case you want to do just that!

Theresa <===== Where all the fun starts!
Kim
Claudia
Denise
Debbie
Sharon
Lisa <====== THE END!
 

Sunday, January 10, 2016

I did a layout... It's About ME! (*gasp*) - (AKA:It'sFinally "Tomorrow", and I Promised my "DUH!" moment)

Howdy there! If you've come here today because I promised you something yesterday, then you're in luck, because I followed through! You came back to the right place, because I'm here! with lots of little goodies/nuggets to find.

I've slacked a lot in the scrapbooking department. I never scrapbook about myself. I mean NEVER. I don't really want to see pictures of myself. I don't really have that many pictures of myself... Like most of you, I'm the one with the camera (or the phone) out and I slink away when others have one out and/or put on a fake smiley over-exaggerated face or sometimes a funny face. Whatever the reason, I'm going to totally rationalize it, so you'll never win because I'm the one who always wins here the pics just don't get out there.

Let me give you just a tad of background... Many of you may have seen my post from yesterday. In that post, I was supposed to make a card. A "technique" card. An emboss-resist technique card. We were even given four (4... Count them... 1, 2, 3... 4!) different links to watch videos of people making... you guessed it! CARDS! Did I make one... Nope... Well, not at first anyway... Somehow, someway, I missed that key word. CARD. And so... I made a layout. New Year... New Me... Stepping out of my box/comfort zone... "Shheeee... I'll make a layout about ME! and my Journey... that I actually planned for and was going to start on January 4th, 2016." layout. Yep. I did. I worked hard on it.

I had issues with PicStitch (an app on my phone). I would choose 9 photos and then begin placing them. Placed the first one yay, me!... And *whoosh!* when I clicked back to place the next one... or edited one, ALL. of. the. other. pictures. were. gone. And I kept trying... You know how apps get, right? They have lots of teeny-tiny little gremlin bugs within them that are laughing at you every flippin' time something wrong happens until finally... you get it right. And finally, I got it right... or as close as I was going to get it.
If you look closely, you'll see... in each little box, I've added text or a drawing. I'm so proud of myself. (*pats "self" on back*) This is me. Untouched. Unfiltered. RAW. Okay... not that dramatic, and I didn't shoot in RAW, sorry if you photo-peeps mistook that... About my journey hopefully this one will stick and I'll actually finish it because I did invest money in myself... and the beginning of a scrapbook about myself. My children do deserve to know or remember more about me not that I haven't told them all of this stuff a thousand times or more, but one day... when I'm unable to tell the stories any more, there will be stories in my personal about me! scrapbook, for them to either read to me in my demented state... let's face it, we all might be there some day or to read and share it with other family members one day. (We all should do this... keep family histories alive!)

Anyway... I wanted them to see that each of us try things. And we have to work for what we want. And work... HARD!

And so... I began a layout to go with it. Working steadily... diligently... playing with Photoshop Elements because you just know the dang pic won't print in the right size without things getting cut off here and there, I know... I tried. It took me 3 printings to finally put it through Photoshop and resize the dang thing and getting it printed. Sorry... totally flaked on taking a screen shot of that. I know you were totally waiting to see a screen shot of Photoshop, huh? Yep. Thought so...

Since I was beginning my journey, what better paper to use than something similar to a notebook page, right? Right!
And if you read yesterday's post, you should hopefully remember we were doing the emboss-resist technique...

And then... I stamped the "2016" and "New Year New Me" stamps in clear embossing ink:

And sprinkled clear embossing powder ALL OVER IT!
And it came out like this kinds dingy and gross-looking and definitely not clear-looking...
That's what you get for using a pad that looks like this: (Clean your stamps as you go, people!) Yes... that's all kind of ink and glitter and... who the heck even knows!!??!!
I sponged one of my favorite Distress Inks all over it... Not so hot...
So, I tried spraying a mist of water on it...
No help.

And I moved on... to another sheet of paper. Don't fret! I did not waste that paper... I now use it as a mat for whatever I'm pouring embossing powder over... it still curves and funnels beautifully!!!

But in the meantime... SQUIRREL!!! Did I ever tell you I have just a touch of ADHD? Hmmm... well, combine that with a little OCD, and... you've got... ME! I was getting fed up with trying to find inks because you know that since the holidays and all came directly after the handy dandy hubs completed the new craftroom and I haven't had time to organize it... STILL! Doing all this resist stuff requires INK. And so... in the midst of all this layout-making, I built this cart it was so hard, I still feel like I'm sweating from the workout, moved this whole big box of inks into the cart, and totally felt better. Breathe...
Back to my layout-making... and this time since the last stamp pad obviously had residual ink from uncleaned stamps, I went with the "tinted" dries-clear embossing ink, which looked like THIS:

yeah I know... looks much worse than the first stamp pad, but I was willing to try. Guess I'm going to have to go SHOPPING for some new embossing ink pads, huh. What a... BUMMER! Ha!
and stamped the same two stamps on the new paper...
and applied my heat-embossing tool to it, then used bright sunshine-y yellow on it to make it more positive and hopeful.
Wasn't quite happy with it... so I misted it with water. After misting it with water, it tore just a tad which is totally what I'd intended but not intended to do. You follow me? Me neither! Notebooks need to look worn-ish, right?
On some YouTuber's video, somewhere... someone had said to mist the bottom as well as the top, so that it dries more evenly and doesn't curl. Well... you see how that all worked out...
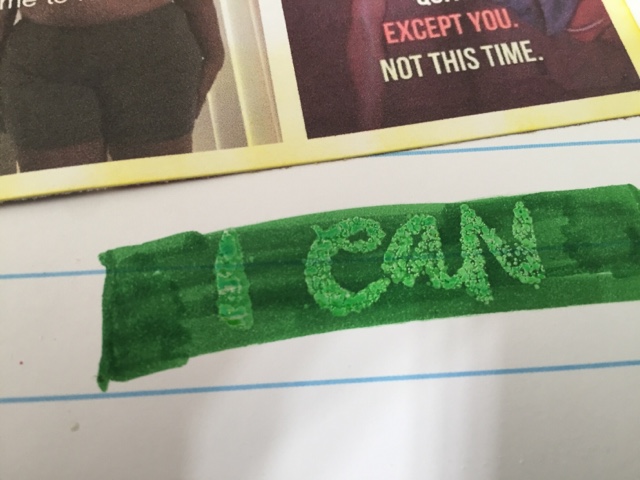
On to my next stamp... "I CAN" because I can! Because I really truly can! because I'm really trying to have faith in myself that this time is the time and I will succeed because... Did you guess it? I CAN! I brushed it with some green is for "GO!", don't you know? watercolor markers (see the beading on top of the embossing?),
and brushed it off with a wipe.
I did a bit of doodling and some writing... and called it a day! YAY! ME!!!
complete finished layout... (please note... AHEAD OF SCHEDULE!)
And then... I went to post it for the Card Technique Challenge. remember... if you're following this, for some oddball reason, I hadn't been seeing/reading the CARD word As I was reading the pasting job of the "write-up" because some of us don't use the write-ups word for word and we tweak them as we see fit, the word "CARD" kept jumping out at me!!!! Whole. E. Shhhhh... ute! No flippin' way! I was WAY ahead of the game for once and had to start all. over. again. (See yesterday's post to see what I ended up doing as a last-minute card. I actually think it turned out pretty well. And then... of course I think... Otherwise I wouldn't be alive, right? Right.

By the way... In case you missed it... the above paragraph was my totally "DUH!" moment...
----------------------------------------------------

The back story behind the layout?

Full honesty here, folks. No jokes. Some of us have struggled most of our lives with weight. Whether we're too heavy (like me) or too light (like lots of other people). If you happen to have never had to deal with either of these problems, in ANY extreme, please consider yourself very lucky. Have a heart, since there's no way you could possibly understand, and do not judge.

So... in my goal to be healthier (this started WAY before "New Year Resolution" stuff...), I committed to a 90-Day Shred Challenge. I have a friend who kinda talked me into it... who is an "It Works!" distributor. I've watched her shrink and be much healthier. And I know her... so, I've actually been watching it work for her. I'd already cut way back on my portion sizes, added more salads, but down (pretty much cut out) my beloved Coca-Cola, and upped my consumption of water. On my own, I'd already lost 10 pounds. But I had (still have) a lot more to go. Enter my friend, who offered me support and just to try the 90-day challenge... I said yes.

I'm here, 5 days after the challenge started. I have not added exercise yet, but yet... I'm down 4 more pounds, feeling fully satisfied, and not craving a thing! Yay me! and just so you know... writing all this about myself and doing a layout of ME is a complete challenge on it's own. Had to up my game and step out of the "self" box.

Please feel free to share your struggle(s), challenge(s) and even your own "DUH!" moment(s) in the comment section. I'd love to hear from you and get to know YOU a little better, too!