Showing posts with label Distress Inks. Show all posts

Friday, February 17, 2017

A Year of Card Techniques - (February - So Sketchy)

Guess what? It's THAT time of month again... No... not THAT time... THIS time!!!! It's the day we have our Monthly Year of Card Techniques (month TWO!), and today, we are doing...
SKETCHES!!!


I had a huge problem... Blogger isn't being nice. They seriously need to update their app. Not only am I getting a message from Apple "Your phone will run slow. This app needs to update." Seriously? Get with the times. But... I kept getting kicked out. And my phone wasn't working (to upload pics)... and then...

I get this... WTH???

Anyway... over it now (and still fuming...)
Here's our sketch! (Cute, huh?)
In cleaning my craft room, I found these little spider dies and decided to break open the package and finally DO something with them... Woohoo! I did a lot of dry embossing this time around... This one is chalked afterwards.
Then... I know! I can't believe it either!!! I did a second card!
and again dry embossed... and used another little die set I found... It's a miracle what you can find if you clean your craft room!!!!

Whelp... Here ya have it! Check out the rest of the gals... and see you next month! Up next is... Jodie!
Michelle

Friday, September 9, 2016

A Year of Card Techniques - (September) Mixed Media

If you are here for the Smarty Pants Blog Hop, please go HERE (not available until 9pm PST!), or you can check out all of my hops for today (there's only two!). We'd I'd love to have you!
 
Welcome to...
 
 
It's month nine of our year-long adventure into different card-making techniques, folds and paper crafting products. We hope you got the chance to hop with us each month.

It's not to late to hop and comment to be entered into our prize drawing. If you missed any of the previous months,  you can click on the month to be taken directly to the start of that month's hop.
January HERE   February HERE   March HERE   April HERE   May HERE   June HERE   July HERE August HERE

This month, we are mixing it up a bit with the mixed media techniques and you won't want to miss the amazing and fun cards we've got for you today. We really love feedback, so please leave a comment on each of the blogs in today's hop. Each comment on the 12 hops throughout the year will be entered into a drawing for a $25 Blitsy.com or Stampin' Up gift certificate (Winner's Choice).

Now on with the projects.

I started with THIS:
Made a mini album, with a whole bunch of different stuff... took pictures... gave it to my "secret pal"... and when I went to put in pics and write about it, the rest of the pics were gone! I can't ask my "secret pal," because then it wouldn't be so "secret" right? Ugh!

And so... I'm going to post a past project... since I use a whole bunch of different media all the time anyway. And OH CRAP! It's not a card... but then again my original project wasn't either. Oh well. It's still great techniques you can use for cards...
If you know me... you know I don't take many pictures of myself or scrap them either. I'd rather not. But... I did enjoy this piece and fun playing with the major components of it. I distressed the crap out of every picture. NOTE: They are printed on textured cardstock!!!!
This lace? I made it myself! Velum... punched with Martha Stewart, stitched through with my machine, then dyed with Walnut stain and crinkled... then formed in the shape of a heart. Say it with me now... "Awwwww...!"
These are "ghost letters" with paint on the back. LOVE IT!!!!!
Thrown together, distressed a bunch and put in a book... totally my style! If you'd like to see the original post, please feel free to go HERE (It's back from 2012!)
 
Hope you enjoyed my little blast from the past...
 
Up next is Denise! Today's lineup in case you get "mixed up" (so you can be sure to visit everyone!):
 

Saturday, July 9, 2016

A Year of Card Techniques - (July) Watercoloring

If you are here for the Under the Sea Blog Hop, please go HERE, or you can check out all of my hops for today (there's only two!). We'd I'd love to have you!

Welcome to...

It's month seven of our year long adventure into different card-making techniques, folds and paper crafting products. We hope you got the chance to hop with us each month.It's not to late to hop and comment to be entered into our prize drawing. If you missed any of the previous months,  you can click on the month to be taken directly to the start of that month's hop.
January HERE   February HERE   March HERE   April HERE   May HERE   June HERE

This month we are playing with watercoloring and you won't want to miss the amazing and fun cards we've got for you today. We really love feedback, so please leave a comment on each of the blogs in today's hop. Each comment on the 12 hops throughout the year will be entered into a drawing for a $25 Blitsy.com or Stampin' Up gift certificate (Winner's Choice).

Now on with the projects!
I tried several types of paper... one of them being THIS (above). Watercolor Cardstock is thick and absorbs the watercolors the water fairly well but doesn't let the colors run like I wanted it to... Oh! And it curls less you know, as papers tend to do when they get hot or wet...
 
 This is just a tidbit (nothing really related to the post)... Um... What's up with THIS, Ranger? I bought two of the same color inks not because I didn't know what I had! as the name is the same, but the color tone on the cover is different. Guess what? They're the same flippin' color. Buyer beware!
I have many Distress Inks... and thought I'd try some watercolor inks as well. I think I like the Distress Inks WAY better for the blotting effect. You'll see as you get closer.
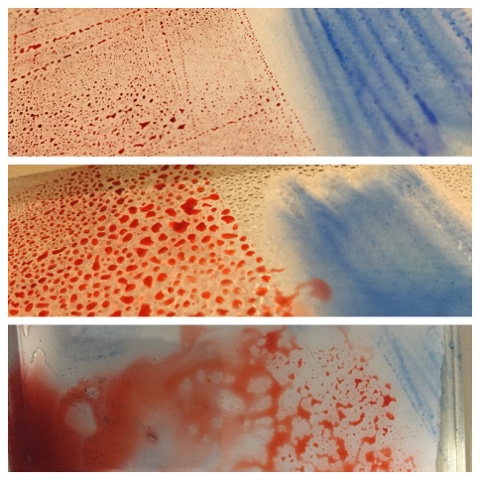
(Looking at the pics above...) And so... I put ink down... sprayed it... then sprayed some more. What a mess!
And these (above) were my results. Yep... for a couple of those I actually tried to DRAW something... hoping the colors would blend/run. Nope. Not for me! I'm not a fan of muddy gray when that's not the color effect I was going for. I'd been brought up to believe "red + blue = purple."
My patience gone... I decided to use a new die (Hello and THANK YOU, Simon Says Stamp!) I'd literally just gotten this week to utilize some of the wasted pieces I'd done. I can do something with it, can't I?
It'd been so long since I've used a thinner die, it took two passes for me to realize I needed the thicker "adjustment" plate. Another "duh" moment in my life.
Thanks to my wonderful little portable Xyron for helping me out here. I wasn't about to apply glue to these suckers!
I placed the wrong one first one down on one of my faves (craft cardstock!)... and realized it was slightly off. With that delicate of a cut, there was NO way I was going to be able to remove it and place it correctly in tact. So, I line up the die for placement purposes, and voila! There she is... Isn't she so pretty?
In light of several people passing recently, and my lack of sympathy cards in my stash, I decided to make this a beautiful one. because when you HAVE to do one and your mind is on the sad moments, your (at least mine!) best work isn't usually there. and they're thrown together. and ugh. they don't always look so great.
But... I had to chop the cut in order for it to go through my itty bitty Xyron after looking for 20 minutes for my bigger one... I just gave up and cut the dang thing. Remember to burnish well... I do this with my finger because I relate fingers to boogers so there are no glue boogers and then with a pen/pencil along the outline and the inside line/s. The sharper the better to get in every little crack.
A side view... So you can see the raised effects of that AWESOME die! I think I'm in love and you will definitely be seeing this one (and the other one I bought!) in the future! It is super versatile.
And the finished card. I didn't believe it needed that "something else" or "just one more thing". This one... I thought and still think it's just beautiful enough in it's simplicity.
 
*** A note *** When I created this card, it was before the mass shooting of officers in Dallas. Please take a moment with me and wish the officers, the families of those slain and the rest of our country peace. This isn't the answer! All lives matter. Yours, mine... ours... We are one and the same. Please love everyone. You don't have to "like" them... But they are all your people. You must love them.

Thank you for staying with me... Back to the topic of today... WATERCOLORING! which I really do L-O-V-E, only it didn't seem to want to do what it was supposed to... Like a rebel child/me! Up next is Jearise! Today's lineup (so you can be sure to visit everyone!):


Friday, April 8, 2016

Bee Happy Blog Hop

Welcome...
http://conniecancrop.blogspot.com/
to the Bee Happy Blog Hop! We are buzzing with joy!! It's Spring; the birds are singing, and the bees are buzzing! So happy you decided to join us in this fun bee themed blog hop today!
 
You should have buzzed on over from Pam's bee hive. If not, the Queen Bee is Connie Can Crop, and she is the first stop in this hop. This is a one day blog hop, and we appreciate your leaving a comment for all of these amazing crafters.
 
We have an awesome sponsor for this hop!
One lucky winner will win their choice of 3 their awesome files in their shop!
Be sure to check out their shop online HERE;
Visit them on facebook HERE;
Follow their blog HERE for inspiration!
 
What do you need to do to win? Easy... become a follower of each of the fabulous blogs in this hop, and leave each of them a comment, letting them know what you like best about their projects. You will have until 10 pm Sunday (4/10/2016) to finish the hop and leave your comments. The Winner will be announced on Wednesday (4/20/16) at Connie Can Crop. Be sure to follow everyone and leave a comment along the way!
 
I really need to up my card stash. I send cards out all the time... and I used to have a pretty big stash. Then something happened. My take got bigger than my make! Did you follow that? In plain English because my other English was more plain than this, apparently, all the stuff I've been making, haven't been enough for the taking. Did you get it this time? And so... it appears that most of my blog hops and challenges and pretty much mostly everything for awhile just might be cards.
 
I needed a pick-me-up type of card for a dear friend who was in a car accident. I have a sympathy card, but um... not quite appropriate. I had an ouchie card... again, not quite appropriate. I'm not very appropriate, apparently. I decided to put a bee in her bonnet and get into some of her bee's-ness (haha, get it?) and make her bee happy! hahahaha! I love all the plays this "bee" word can make!
I started with a cute little dollar-store stamp, in Walnut Stain Distress Ink - Tim Holtz... I LOVE YOU! I wanted it a little "fuzzy" (because that's how bees are, ya know...) and not so crisp. The Distress Inks are perfect for this. I filled in the white body parts with Zig glue... sprinkled on some Martha flock (in a yellow daffodil) and let 'er rest a bit. Then tapped off the excess flocking. didn't need FUZZ everywhere... 
If you read me you know, not "me" per se, but at least my blog, then you may have read several other posts where I used a clear or colored Crystal Lacquer. Whelp! I did it again! I put that light blue pastel Crystal Lacquer in the wings, being extremely careful not to put it on the lines. Patting self on back. Good job, Lisa!!!
Ok... this pic's not so hot. I'm having close-up difficulties with the iPhone 6 (in case you want to give me FREE advice on better techniques to use with said phone) and I'm really just too lazy to go get my "real" camera, take pics, download said pics to the computer, upload said pics to my blog... See? Way too much work. I'm tired already. Anyway... the pic is supposed to bee the stamped and embellished image with further embellishment. Can you tell what I did? Yup! I sprinkled Pixie Dust on the wings. But they didn't fly... and neither did I. But it really does look good, in person...
I don't hate my writing. I used my writing skills  and wrote out the word "Bee" on the front of the card in more Zig glue and sprinkled more flocking. I was impatient and simultaneously glued and flocked the word "HAPPY" in HUMONGOUS letter on the inside and neglected to let it dry enough...
I inked up the edges with another Distress Ink (did I tell you I love Tim Holtz?). But it still wasn't enough. After reviewing several of my posts, I'm starting to think I'm a Children's Lit author with a sing-songy voice and repetitive phrases... kinda like when there is a chorus or trademark...
And so... since the Pixie Dust didn't seem to work...I made my bees fly! (with a little penwork...

My advice? Let the outside dry before working on the inside. Now, I'll have to slice off the cover and attach it to another card. Ugh. I hope you like it anyway. I know my friend will, when she gets it! I just want her to "Bee Happy"! (and YOU, too!)

Up next is Sarah... buzz by her blog and see what kind of bee-you-tiful stuff she's got goin' on!

Here's our line up in case you get lost:

Friday, February 19, 2016

Black Tie Affair Blog Hop

http://conniecancrop.blogspot.com/
 Welcome to the Black Tie Affair Blog Hop
We are so delighted you are joining us for this very formal occasion where we will be showcasing projects with class, from weddings to homecoming dances.

 Connie Can Crop (that's me) is the first stop in this hop. This is a one day blog hop and we appreciate your leaving a comment for all of these amazing crafters. 

We have an amazing sponsor this month!!
 
http://www.3dsvg.com/
 
One lucky winner will win a $20 gift card to shop their awesome files in their shop! 
Be sure to check out their shop online HERE
Visit them on facebook HERE

What do you need to do to win? Easy... become  a follower of each of the fabulous blogs in this hop and leave each of them a comment letting them know what you like best about their projects.

You will have until 10 pm Sunday to finish the hop and leave your comments.

Winner will be announced on Wednesday 2/24/16 here at Connie Can Crop.

Be sure to follow everyone and leave a comment along the way!

Okey dokey. Here I am! With... GUESS WHAT?!? Another Project!!! Woohoo!!! And even though I'm not a real fancy-pants and don't like to dress up...  You can always look at other "fancy" black-tie stuff I've done!
 
Now... I know you might all get tired of my distressing out on everything, but just so you know... It's here to stay! However... the Chevron trend HAS GOT TO GO! I used Distress Inks, Stickles, the Cricut Explore Air, and all the stuff I love so much again! What a flippin' shock, right?
 
Designing things... it's fun. And so I wanted a night of magic. Magic Night. I was thinking "Puttin' on the Ritz". And I'm totally not apologizing or anything if you can't get that song out of your head now. Deal. Top hats... Canes... Glitter... Glitz. "Puttin' on the Ritz!" Yes... I love '80's music!!!!
 
I placed the top hat cuts , the bands, the bowties and the buttons all on a grey card that I had distressed with a darker grey. Then Stickle-d the **** of them! lol! I love Stickles!
Be sure if a big ol' glob comes out, use a paint brush to smooth it all down. Heck! Use a paint brush anyway to make it all Even Stevens.
I used a craft knife to scrape up the excess... the best I could. Forgive the blurry pics... I totally don't know what came over me!
And again, I Stickle-d the letters on while they were still on my mat... Just to make my life (and crafting a tad easier). It works. Just be sure it's all dry and all before you try to peel it up and it comes off/tears off in a pulpy mess!
And... just another note... before you or I go over the glued-down stuffs with clear plastic (like I've done before...) make sure the Stickles have dried.
I love magic. And the Cricut, Stickles, and glue make it all magical! Donchya think?
 Up next is Michelle

Here's our line up in case you get lost.

 
Want another chance to win!! Enter the monthly challenge at Connie Can Crop!!
You could win $50 to spend at Dreaming Tree!!

http://www.conniecancrop.blogspot.com/2016/02/monthly-challenge-43-i-do.html

Connie Can Crop Challenge #43
due 11:59 P.M. Monday, February 29th
Pacific Time

Saturday, January 2, 2016

Ringing In The New Year Blog Hop

Wow! Time sure does seem to go fast. It seems like yesterday I posted things on Last Minute Gifts... Only, that was a couple of weeks ago. Christmas has come and gone... my ten-year-old-soon-to-be-eleven-year-old is already counting down the days until next Christmas... and yesterday was New Year's! Welcome to 2016!!! and... 

Welcome to the Ringing in the New Year Blog Hop!
This blog is meant to inspire you to... just get started! Craft for the New Year! Do whatever your heart desires! You'll see lots of crafters in this hop, and lots of different things to be done. Some may even have blog candy. So, if you've come here from Lori's blog, that's great! Just follow along... If you "just happened" here because you love me SOOOO much and absolutely missed me and needed to start your New Year with me, that's great too! If it's the latter, feel free to start at the beginning (where the GP [that's code for Grand Prize] is) on Lisa's blog duh... I know it's not me. It's the "other" Lisa... get over it where she's sure to fill you in.

Just some quickie rules...
  1. You must comment on each blog to be eligible for the prize.
  2. You must have fun while you're doing all this.
  3. You can choose to follow or subscribe to some of our creative people.
  4. And did I say you should have a good time?
That's it. Simple enough, right? Right! So, on with the project(s) because you know I actually did kinda sorta more than one this time, right?

While everyone else was texting and posting and screaming and drinking and sleeping and... and... for the HAPPY NEW YEAR, I was as I do every year... wishing my middle daughter a HAPPY BIRTHDAY! Yep. She was born on January 1st. 22. Years. Ago. Yep, I'm that old or that young, depending on your perspective. And so... every year, I make a card or try to... depending on my laziness meter reading and this year I wasn't too terribly lazy to make a card. so HA!

Since it's been all holi-dazy around here, I've got some songs on my mind. And every song seems to fit into what I'm doing, like typing this entry right now. So...

"Let's start at the very beginning. {dink dink} A very good place to start. When you read you begin with A-B-C." When you craft you begin with... Yeah... I don't know either. Just thought I'd try...

But in this case, I started with the Cricut Design Space's "Make It Now" only, I didn't "Make It Now". I customized it... and saved it for a while... and worked on it some more because I have absolutely no patience with a computer that keeps freezing. And yes. I know it was my laptop, because it all worked fine on my phone and iPad. So whatever. But I was totally too lazy beside the fact that the freezing wouldn't allow me to save it...

And so... this is the starting at the very beginning {dink dink} base idea...
Except it cost $4.99. And for those of you that really truly know me (or have it already figured out), I wasn't going to pay that much for one design cut. I like free. Free is good. Except that my "free" isn't always really and truly "free", since I do pay for a subscription. But this one cost... until... I unattached items, and pulled it apart, and found out the font is what cost. Everything else I already had through the subscription. (In case you haven't figured it out yet... the subscription is totally worth it!) I yanked out each and every one of those letters. I didn't like that font any way! I switched in a different font, changed all the layers to the same exact color. My dang computer kept freezing!!! Otherwise, I would've just pulled them down into each other and attached synced them. I also added a handful more pennant flags. Then I duplicated all the elements three times (I have 3 adult female birthdays... all daughters... from January 1 through February 15. And I am always determined to make them equal!) and put in letters for each of the girl's names.
Going to cut. Design Space put all the letters up into strips... with a block and a couple of strips. Nuh, uh. We (me, myself, and I) don't play that. We (me, myself, and I) are complete hoarders, tree huggers, paper savers. I moved (from the cut screen) the letters into a full block, so as to utilize a scrap of paper, rather than a 12x12. (This photo shows the suggested cut and some movement to the block.) In other words, you don't have to cut the way the program dictates. YOU can lead it! YOU HAVE THE POWER!!!!


With all the letters cut out, the program advanced to the pennant flags. Note to self: paper tears when the blade doesn't go all the way through the paper. Duh.*Please NOTE: Be sure to check your blade (by releasing the housing from the holder and pushing the top "button" down). If there is paper on the blade, take it off CAREFULLY. Otherwise, you will waste a ****load of paper. (Note the torn cuts in the background and throughout these next photos.)
Here's the salvaged ones. Yep. Gonna have to re-cut some more to make the other two cards. Sometimes planning ahead (getting those other cards done) doesn't work out so much. Maybe I'll go back to complete procrastination... They are ready to be colored (inked... whatever words you choose. You know what I mean).
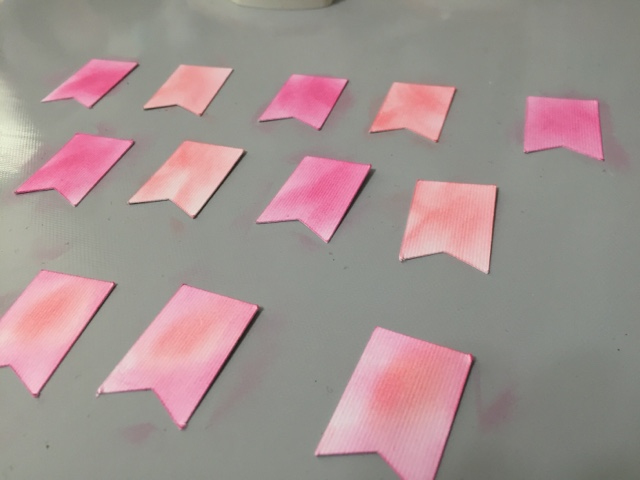
And here's the colored ones... In a simple step, I inked with two obviously separate pink inks and a Ranger blending tool. The bottom three (for my daughter's name), I inked both inks on. Doesn't it just make you totally hungry? Now I'm craving raspberry sherbet!
And those of you who know me know I like a little distressing... so, I used one of the trashed! for shame! NOTHING, NOTHING is ever "trash" in a craftroom!!! torn pennant flags to test various different Distress Inks. I went with the top right corner. Antique Linen for the win! (Sorry for the blur...)
I don't know about you, but sometimes I really hate... 4-letter word! dislike penning a wet adhesive on very small letters. So, I used my Xyron X. Love it. I am such a pincher, I try to make sure I use as much of the sticky as possible, but try not to have the letters overlap. I use tweezers or a craft knife to push the letters to the proper position, before pulling down the sticker tape. Btw... pink is SOOOO not my favorite color, but that's what was available for the machine back in the day... yuck.
It comes out like this. See all the bubbles? Burnish them HARD with your finger. Rub it all over. And it still won't be enough...
Now, take a pen or a fairly sharp pencil and draw around each letter, through all the openings, too. Note the "P"... I did not write in the opening of the "P", and caused little glue boogers/snot. Yuck. Nobody wants that. Press hard. Do it twice if you didn't feel the contact with the opaque paper underneath.
Peel off the sticky top. And now you should have stickers with no gluey bits about them. Gorgeous! Place each sticker on its corresponding pennant flag (picture not included) and get ready to glue.
If you've read my blog before, you may know I love Home Depot. I buy silicon caulking on a regular basis. It is so much better to me than pop-up foam. Peeling off those little bits of sticker back is just SOOO not for me. It frustrates me and gets caught underneath my nails; then the little bits  of backing never make it to the trash can, because when you try to put them in, they float away to the floor. Double Ugh. So, I applied a strip at the top, to hold a little pink and white baker's twine (Have you figured out yet that my daughter's favorite color is my least favorite color? Pink. Triple Ugh.) and a dollop of Daisy... haha... you're showing your age if you get that one... in the middle of each pennant flag. It dries clear and adds the 3-D look I was going for... I spaced them out according to the size of the card and curved them "just so". Then the twine was laid across the top, the card place on top of that in a very reckless manner... It so totally could've gone in the wrong spot, but I was feeling dangerous in the craftroom!
And I flipped it!!!! Yay! It actually turned out okay!
Woohoo! Love it so much, Let's look at it AGAIN!
Just repeat with the other pennant flags, making the 3 banners... Only, the last banner has no 3-D. I realized I had pretty much no space left. So... I slid it underneath. Shhh...
Next up? Um... see those loose ends? And all that wet 3-D caulking? Um yeah... Now we must proceed very carefully.
Solution! Cut 2 small-than-the-card-side inserts and place them inside with dry adhesive (after wrapping the loose ends of twine toward the inside) on the back. But press down VERY carefully, so as not to smoosh (yes... that is a word. don't ask...) the precious 3-D architecture on the front.
And there ya have it!
But... that's not all...


See how well it's raised? Super awesome.
Then we have the gift wrap. This paper. I just love it. And it only cost a dollar at the Dollar Spot in Target!!!! But the twine...? Way too bland. And yes... this is what I totally procrastinated on... wrapping the gifts... Ugh. And I couldn't find anything that hit my fancy in my stash to replace the twine. What's a crafter to do?
Dye it!!!! I poured some of the mist into a bowl and added some drops of each of the alcohol inks and I did not realize what I thought was red was actually watermelon. Oops. and mix them up.
Put the twine in, mix it up, then bag it to toss in the dryer dry on high for just a couple of minutes. Make sure it's spread out and not balled up, otherwise you might send it wet and stainy, just like I did.
See how it stained my hands?
The right one's worse... And my ten-year-old-almost-eleven-year-old insisted on painting my nails... I told her it wouldn't last. Who's right?
The color matches as close as I can get it.
And tied it in a bow! It's still wet but... Ready to go!
You've got a card AND a wrap! And that's a wrap! Hope you enjoyed my projects and hope they inspired you to craft in the New Year.

Please don't forget to leave a comment otherwise I just feel like I'm talking to myself on a regular basis. Oh wait! I do that, too! and visit the other blogs. Next up is Sarah, who is sure to have some awesome inspiration, too.

Here's the full lineup, in case you get lost or would like to revisit someone. Have a fabulously crafty New Year!

  1. Lisa ~ http://honeybearzdesigns2011.blogspot.com
  2. Kim ~ http://katydidcards.com
  3. Holli ~ http://Sunflowerholli.blogspot.com
  4. Miranda ~ http://www.nanasscrapspot.com
  5. Connie ~ http://conniecancrop.blogspot.com
  6. Barbara ~ http://barbarab3.blogspot.com
  7. Lori ~ http://savingmine.blogspot.com/
  8. Lisa F ~ http://lisaslittlerascals.blogspot.com <==== You are HERE 
  9. Sarah ~ http://www.sarahbiswabic.blogspot.com <==== UP NEXT!
10. Rhonda ~ http://craftingwithblue.blogspot.com