Saturday, July 23, 2016

Christmas in July! (Day Two)

Welcome to Day Two of... Christmas in July!

We just couldn't stop playing with the holiday theme, so we've got a second day filled with great ideas that you can start creating now for Christmas. Along the way today, you'll find card and gift ideas, a scrapbook layout page or two and even a couple great decorating ideas.

We hope this hop gets you in the holiday spirit a little early this year.

We'd like to say a HUGE THANKS to our sponsor today.
http://www.stampinup.net/esuite/home/scrapsbygracie/

Theresa is giving away a $20 Stampin' Up Gift Certificate to one lucky winner AND take 10% off any order placed through her (not available on website) by July 30th. Email her at scrapsbygracie@gmail.com with your order.

All you have to do to win this fabulous prize is comment on each of the blogs. That's it! It really is easy. Of course, we would love it if you became a follower too.

Comment buttons can be found at the bottom of the post (on most of the blogs). (and for those that you can't find... it's probably at the top next to the title of the post!)

Now on with the hop!

Can you tell I'm not all about cards or layouts at Christmas YET?

I'm extremely cheap! frugal. I saw some stand-up letters somewhere, all decorated and such... and they cost $30! per set!!!! of two!!!! OMG!!!! He** NO! I would NEVER pay that. That'd be $90 for Santa to laugh!

So I bought some paper mache letters at Michaels remember I'm cheap... so of course I used a coupon! and painted them up. I was going for the "snowy mist" look... it didn't work. How do most of us fix mistakes? Cover them up! Work with them. I applied a ton of Mod Podge then sprinkled a ton of ultra-fine red glitter. Remember... it gets EVERYWHERE!!!! Just a little note here... There aren't painting pics because I probably accidentally deleted couldn't find them. So sorry. Not sorry. They really were kind of boring pics...
I wanted my letters to sit together permanently, but be separated. Make sense? Well! It does to me! I used my FAVORITE silicone caulking! It's not just for cards and layouts, people!!! and made three little lifted blobs and set them together, making sure they were the perfect distance apart. And no... I didn't glue the three sets of letters together, Silly! Can you imagine the nightmare of storage?
More up-closes of my beauteous letters! Sorry I don't have a Christmas-sy background... it's a little early in the year for that! Also... I hope you don't take the "HO, HO HO" personally.. if you do, please get therapy for your issues and don't take them out on me!
and here are all three sets! I haven't decided yet if they'll go on different shelves... or all in a row... or strung out... the possibilities are endless. But I love how they turned out! Don't you? And I did have a friend ask me, "Where's mine?" LMAO! Are you kidding? Wait for your birthday, girl!

Miranda's up next, and I'm pretty positive she's got some more holiday bling to share with you.

Here is today's hop line-up in case you get lost along the way:

Theresa ~ http://scrapsbygracie.blogspot.com
Barbara ~ http://barbarab3.blogspot.com
Kim ~ www.katydidcards.com
Alicia ~ http://goldengoddessdesigns.blogspot.com
Lisa ~ http://lisaslittlerascals.blogspot.com/
Miranda ~ www.nanasscrapspot.com
Daphne ~ http://craftyscrapsofstuff.blogspot.com/
Holli ~ Sunflowerholli.blogspot.com
Sharon ~ http://piece-ofheart.blogspot.com
Sarah ~ www.sarahbiswabic.blogspot.com
Amanda ~ http://salnclts76.blogspot.com
Jearise ~ http://lorbysworld.blogspot.com

If you missed Christmas in July! (Day One), please go to Theresa's blog and scroll down a post. Or... you can start HERE! and hop on through.

Friday, July 22, 2016

Christmas in July! (Day One)

Welcome to Christmas in July! (Day One)

Get ready for some great ideas that you can start creating now for Christmas. Along the way today, you'll find card and gift ideas, a scrapbook layout page or two and even a couple great decorating ideas.

We hope this hop gets you in the holiday spirit a little early this year.

http://www.stampinup.net/esuite/home/scrapsbygracie/

Theresa is giving away a $20 Stampin' Up Gift Certificate to one lucky winner AND take 10% off any order placed through her (not available on website) by July 30th. Email her at scrapsbygracie@gmail.com with your order.

All you have to do to win this fabulous prize is comment on each of the blogs. That's it! It really is easy. Of course, we would love it if you became a follower too.

Comment buttons can be found at the bottom of the post (on most of the blogs). (On a few blogs, the comment button is at the top, near the title.)

Now on with the hop!

If you came here from Alicia's blog (Golden Goddess Designs), then you're in the right spot. She sets the bar pretty high, doesn't she?

Do you remember... how I said I was going to get to organizing my craft room and use up what I've got and not purchase anything else? ever needing a food-safe goodie bag, but never finding the right size, color, or pattern? I sure do! So when HSN aired their 24-hour crafting event earlier this month, boy, was I in trouble! I saw the perfect solution! We R Memory Keepers has the most awesome tool to create custom bags. And it came with food-safe glassine paper, too! It came with mini clothespins and gold sticker/sealer-thingies, too... but I'll probably never use those...
And so... I played! And played! And played! I made several different sizes. Here's my notes:
  • Be sure to keep the instructions just in case you have a "Duh!" moment and it comes super late, like I do so often
  • Do not place the paper (and the tool) on a gripping surface. (The paper doesn't quite rip as easily - it grips to the mat/surface.) A self-sealing mat will suffice and work well. It goes so much better. I know this after making over 15 bags. It took a while for me to figure that part out.
  • Do not cut the paper in the size you want, lengthwise... Only cut the width. Otherwise, you'll be "duh'ing" yourself every time you have to grip a teeny tiny edge to make your bag not "shrink" due to "waste". (like I did... many, many times!)
And so... after semi-perfecting my bag-making... I began my Christmas bags!

I got this perfect paper (on a roll) a while ago 2 years ago and was hoarding it! from Williams-Sonoma. I don't know why... but on a trip there less than a year ago, I tried to get more and they claimed they've never carried it. It is not currently available, I guess.
Adding to the notes:
  • Be sure to cut the edge (sides) of your paper straight! If you don't, then your bag and measurements will be a total disaster... trust me...
The directions come with the tool... but just in case...
  1. Cut the top and bottom to the size you want with the serrated edge of the tool. GO SLOWLY. unless you want to rip the paper... it's pretty easy to do.
  2. Fold the paper along both sides according to the tool indents. Use the tool to fold it perfectly.
  3. Fold the bottom up. Use the tool to fold it perfectly.
  4. Add adhesive to the inside (wrong side) edge of one side, and the folded outside (right side) edge of the other side and press together. (I used my ATG gun for this. Worked perfectly!)
  5. Add adhesive to the bottom flap and fold up. Voila!
See the inside? Isn't it WONDERFUL????

Yep! My need is for 100!!! I can do it!!!
Add a tag... change it up and add it several ways. Secure it, or don't. It'll look great either way. Now they are just waiting for some Christmas cookies! Yum! Thanks for visiting!

Miranda's up next, and I'm pretty positive she's got some holiday cheer to share with you.

Here is today's hop line-up in case you get lost along the way:

Theresa ~ http://scrapsbygracie.blogspot.com
Barbara ~ http://barbarab3.blogspot.com
Kim ~ www.katydidcards.com
Alicia ~ http://goldengoddessdesigns.blogspot.com
Lisa ~ http://lisaslittlerascals.blogspot.com/
Miranda ~ www.nanasscrapspot.com
Holli ~ Sunflowerholli.blogspot.com
Sharon ~ http://piece-ofheart.blogspot.com
Sarah ~ www.sarahbiswabic.blogspot.com
Amanda ~ http://salnclts76.blogspot.com
Jearise ~ http://lorbysworld.blogspot.com

Be sure to hop tomorrow too for even more great holiday projects and ideas. You can start tomorrow at Theresa's blog.

Saturday, July 9, 2016

A Year of Card Techniques - (July) Watercoloring

If you are here for the Under the Sea Blog Hop, please go HERE, or you can check out all of my hops for today (there's only two!). We'd I'd love to have you!

Welcome to...

It's month seven of our year long adventure into different card-making techniques, folds and paper crafting products. We hope you got the chance to hop with us each month.It's not to late to hop and comment to be entered into our prize drawing. If you missed any of the previous months,  you can click on the month to be taken directly to the start of that month's hop.
January HERE   February HERE   March HERE   April HERE   May HERE   June HERE

This month we are playing with watercoloring and you won't want to miss the amazing and fun cards we've got for you today. We really love feedback, so please leave a comment on each of the blogs in today's hop. Each comment on the 12 hops throughout the year will be entered into a drawing for a $25 Blitsy.com or Stampin' Up gift certificate (Winner's Choice).

Now on with the projects!
I tried several types of paper... one of them being THIS (above). Watercolor Cardstock is thick and absorbs the watercolors the water fairly well but doesn't let the colors run like I wanted it to... Oh! And it curls less you know, as papers tend to do when they get hot or wet...
 
 This is just a tidbit (nothing really related to the post)... Um... What's up with THIS, Ranger? I bought two of the same color inks not because I didn't know what I had! as the name is the same, but the color tone on the cover is different. Guess what? They're the same flippin' color. Buyer beware!
I have many Distress Inks... and thought I'd try some watercolor inks as well. I think I like the Distress Inks WAY better for the blotting effect. You'll see as you get closer.
(Looking at the pics above...) And so... I put ink down... sprayed it... then sprayed some more. What a mess!
And these (above) were my results. Yep... for a couple of those I actually tried to DRAW something... hoping the colors would blend/run. Nope. Not for me! I'm not a fan of muddy gray when that's not the color effect I was going for. I'd been brought up to believe "red + blue = purple."
My patience gone... I decided to use a new die (Hello and THANK YOU, Simon Says Stamp!) I'd literally just gotten this week to utilize some of the wasted pieces I'd done. I can do something with it, can't I?
It'd been so long since I've used a thinner die, it took two passes for me to realize I needed the thicker "adjustment" plate. Another "duh" moment in my life.
Thanks to my wonderful little portable Xyron for helping me out here. I wasn't about to apply glue to these suckers!
I placed the wrong one first one down on one of my faves (craft cardstock!)... and realized it was slightly off. With that delicate of a cut, there was NO way I was going to be able to remove it and place it correctly in tact. So, I line up the die for placement purposes, and voila! There she is... Isn't she so pretty?
In light of several people passing recently, and my lack of sympathy cards in my stash, I decided to make this a beautiful one. because when you HAVE to do one and your mind is on the sad moments, your (at least mine!) best work isn't usually there. and they're thrown together. and ugh. they don't always look so great.
But... I had to chop the cut in order for it to go through my itty bitty Xyron after looking for 20 minutes for my bigger one... I just gave up and cut the dang thing. Remember to burnish well... I do this with my finger because I relate fingers to boogers so there are no glue boogers and then with a pen/pencil along the outline and the inside line/s. The sharper the better to get in every little crack.
A side view... So you can see the raised effects of that AWESOME die! I think I'm in love and you will definitely be seeing this one (and the other one I bought!) in the future! It is super versatile.
And the finished card. I didn't believe it needed that "something else" or "just one more thing". This one... I thought and still think it's just beautiful enough in it's simplicity.
 
*** A note *** When I created this card, it was before the mass shooting of officers in Dallas. Please take a moment with me and wish the officers, the families of those slain and the rest of our country peace. This isn't the answer! All lives matter. Yours, mine... ours... We are one and the same. Please love everyone. You don't have to "like" them... But they are all your people. You must love them.

Thank you for staying with me... Back to the topic of today... WATERCOLORING! which I really do L-O-V-E, only it didn't seem to want to do what it was supposed to... Like a rebel child/me! Up next is Jearise! Today's lineup (so you can be sure to visit everyone!):


Friday, July 8, 2016

Under the Sea Blog Hop

If you are here for the July Card Technique Blog Hop, please go HERE (not available until 7/9), or you can check out all of my hops for today (there's only two!). We'd I'd love to have you!

Welcome to the 
Under the Sea Blog Hop

Thank you for joining us for an underwater adventure Under the Sea!

You should have arrived from Miranda, but if you didn't Connie Can Crop is the first stop in this hop. This is a one day blog hop, and we appreciate your leaving a comment for all of these amazing crafters.

We have a WONDERFUL sponsor this month!!


One lucky winner will win this awesome three pack of sequins!
Be sure to check out their shop online HERE
Visit them on facebook HERE
And their Blog HERE


What do you need to do to win? Easy... become  a follower of each of the fabulous blogs in this hop and leave each of them a comment letting them know what you like best about their projects.

You will have until 10 pm Sunday to finish the hop and leave your comments.

Winner will be announced on Wednesday 7/20/16 at Connie Can Crop.

Be sure to follow everyone and leave a comment along the way!
 
On to the projects! Let's get "Kraken"! 

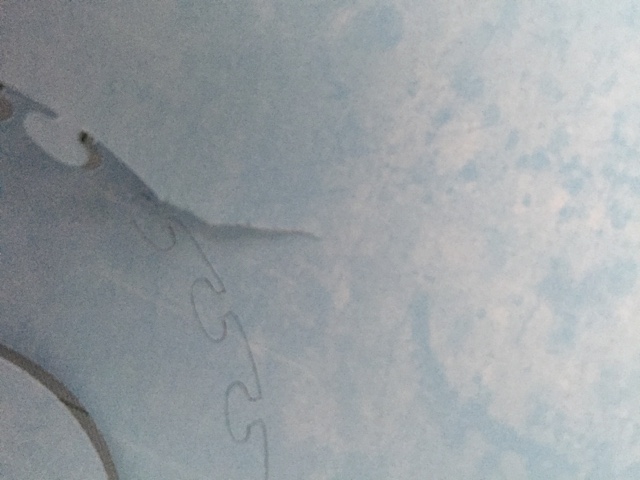
So... in choosing the paper... I loved THIS match. The blue (sky and water) and the ugliness green was perfect for my monster! Do you see a theme here, yet?

His tentacles are AWESOME! I love the detail...
 
On my mat, this is what's left after removing the tentacles. Crazy! "C" for Kraken? lol? I guess if you don't get it... you aren't in my mind, right? But it was funny to me!
Had to cut this a couple of times, since I wasn't using cardstock on the inside. I didn't quite set the pressure/speed quite right. Ugh.
Yep. I am so far from perfect.
And then... Ugh! Be sure to take care in lifting your creations off... Or you could just take it off... easy-speedy like I did...
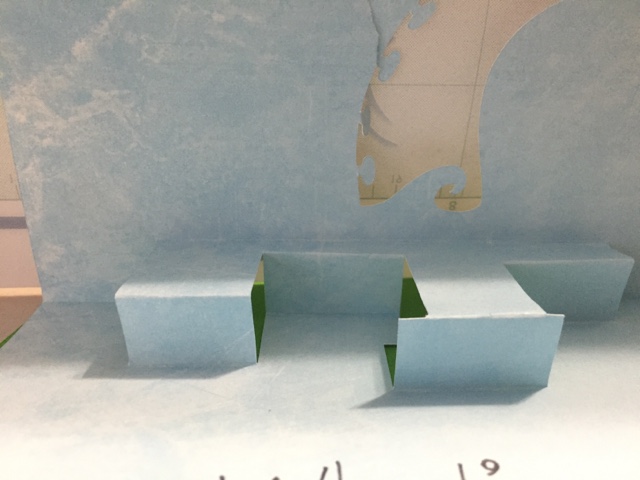
The folds! What a pain in the **s! But the end result is well worth it.
 It took a bit of time and thought, but I did end up getting them just right.
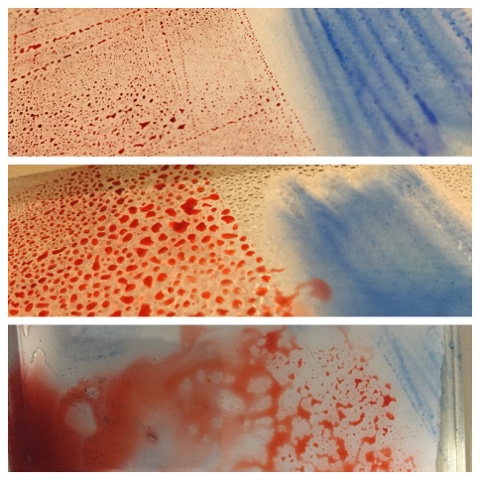
Okey dokey... I loved my Wink of Stella so much... I was so excited to see a whole package of colors! And I bought them of course! Only to find out... they're not brush tips, which I was totally loving... So... I didn't edge the waves in Stella... The line wasn't like I wanted it.
A glittered and glued!!!!
And my waves turned out... just right.

And YES... this is my elbow. Note to self (and everyone else, too!) Be sure to put drying glitter/glue thingies AWAY from your active workstation. Otherwise, THIS could happen to you! I happened to do it THREE times before I finally moved it..

 
Stella... you get another chance. The black was perfect for finishing the cut edges of the tentacles.
See the differences? AWESOMENESS! I can hear the angels singing!
This... wasn't so awesome. Another note to self (and everyone else)... Use your MATS! That's what you bought them for... duh! It did come off (with only a tiny bit of residual ink) with a lot of scrubbing and elbow grease no glitter.
And the inside of the tentacles on the paper insert received a little Stella, too. Hmmm... that reminds me... I think I'll open a bottle...
Ok. Cricut People! People that design cards with inserts! You should note the insert piece should be 1/4" less than the card size. Otherwise this happens, and I am stuck with an unseemly edge that looks like I didn't know what I was doing (which I do/or I didn't... but I'm a fabulous critic!).
And I fixed it with a little... GLITTER!
I so love this card!
The waves... the scary tentacles... the boat in trouble(d - waters)...
I'm so happy I found this in Cricut Design Studio. All on a search for "waves". Otherwise... I had a different idea. This one, just took over!
And if you don't get it... I don't have the patience to explain it to you... Google much?
 
Have a fabulous weekend, and let's keep the Kraken "under the sea!"

 Up next is Christi