Showing posts with label Santa. Show all posts

Friday, December 11, 2015

Cookies for Santa Blog Hop

Welcome to the Cookies For Santa Blog Hop.
This a one day hop with 10 stops along the way that will be filled with all different kinds of cookie projects. You will see cards, layouts, altered art, recipes and all kinds of amazing wonderful projects. Remember this is the time of year when the gloves come off in the kitchen, no low-cal nothing, no skimping on the sugar or the sprinkles. It's the best kind of baking, high test, holiday baking. So be sure to grab your favorite cookie and beverage and hop through this yummy tasty blog hop with us. And now on to my project... Or not... 
Whelp... If you know me... then you know this was no small production and something may (or may not) have gone wrong. Let's start at the beginning...

My friend saw these really REALLY cute cocoa-mug-hot-chocolate-packet-holder-card-thingies. Yeah... It can hold tea bags or hot cider packets or.. or... but who the heck thinks of all that when you see a mug and a snowman? She wanted to give them for gifts to ladies of her Bible study. They were kind of expensive ($3.00 each and you had to put the thing together yourself!). And if you know me, like she does... I'm super cheap, thrifty, frugal, whatever you wanna call it. I can replicate almost anything. *Disclaimer* We were/are not going to sell these... They are for personal use only! And since I recently got the Brother Scan-n-Cut2, I thought my job would be easier.


It wasn't. And that's NOT the end of the story.

It'd be great if I plugged it in first...
First off... Somehow, somewhere, in the transition and re-organization of the new craftroom, I lost the examples or I left them in my car and my husband cleaned it out or I left them in her car or I put them in a safe place and can't remember where that might possibly be because it's so safe. So I looked for a wonderful specimen throughout the internet to cut on my Cricut Explore Air. Don't worry... the BSNC2 story isn't over yet either! And I got THIS:

It's way too fat and too big, and I could only squeeze one out per 12x12" paper. Ugh. What a waste and not so cheap.

So I searched more... and found THIS:

Love it. But... it prints on the cardstock. So obviously, you'd have to cut it by hand, and we all know I'm way too lazy to cut out 8-10 of these by hand. Ugh. Ugh. And if you think YOU would do it, don't you know how busy people are with the holidays all upon us?

So I thought I'd scan it with my new Brother Scan N Cut 2 (BSNC2 for now on... because I'm way too lazy to keep typing all that out) and got THIS:
But I went through all of THIS:
to even get there.  And it cut out the mug like THIS:
Hahaha! How flippin' funny. It's still in one piece with sporadic cuts all around. So... I recalled how Julie Fei-Fan Belzer (Scrapbook Soup, people! Get a clue!) had used a dark black pen and re-traced some lines of things she wanted cut out. And I did the same (on a new WHITE sheet, this time... Oh. And I cut the printing off, since the machine had chosen to cut some of the type on the other try...) And re-scanned it in and pressed cut... Success!
So then, I began putting my Cricut elements together because I still couldn't find those examples and looked every flippin' where and with all that I just went through with the BSNC2, I wasn't about to be doing all that. I'm on a busy schedule, ya know?

I picked out a cute Santa (via Subscription), an Angel (via Subscription), and a Snowman (via Subscription). Can you tell the Subscription is an awesome thing to have? So... this is the way Santa's beard and stuff comes out to cut. I am cheap, remember? not a paper-waster. So... before you click "GO", you can use the mouse (or your finger, if you're on the app) to move items closer or rearrange, so you're actually paper-saving. Trust me... every little bit helps when you make cards or scrap or do any type of paper "work".
And you end up with THIS:
The face I stamped with a Peachy Keenstamp (so adorable... I just love those guys!) and rouged his cheeks with a Baby Pink ink don't tell me you can see my fingerprint in there... I'm in total denial as I was too lazy to open a new pack of blenders.
I applied Frosted Lace Stickles to the whole beard and 'stache... and let it dry a bit...
Then covered up half of the stamped face...   Put on the beard and 'stache...

ended up trimming the face underneath, because I had a duh moment and realized I'd stickled the wrong side of the beard... reversing it? um... doesn't quite match up with the facial base. Ok then... fudge it and trim. We are good.


Added a "che[e]rry" nose, a hat and the white trimmings... And it all ends up looking like THIS:
And my Santa requested THESE:
My Santa loves cinnamon roll (cookies!)!!!

Hope you have a sweet, sweet Saturday! Next up... Barbara, with all her tasty treats!

Here's the lineup... In case you get lost... or wanna start over, or missed someone, or... or...
 1. Lisa ~ http://honeybearzdesigns2011.blogspot.com
  2. Theresa ~ http://scrapsbygracie.blogspot.com
  3. Haidee -http://created2bunique.blogspot.com...
  4. Charmagne ~ http://sanurascraps.blogspot.com
  5. Anna ~ http://grumpygrandmacreations.blogspot.com
  6. Lisa F. ~ http://lisaslittlerascals.blogspot.com (You are HERE.)
  7. Barbara http://barbarab3.blogspot.com            (Next stop on the Tasting Train!)
  8. Jessica - http://www.craftinandstampin.blogspot.com
  9. Rhonda - http://craftingwithblue.blogspot.com

Sunday, November 29, 2015

12 Days of Christmas (Day Six)

Did you partake in Support a Small Business Saturday? I sure did... although I'm a little on the outs with most, as I lost my bankcard last week, and can only currently order from places that take PayPal until I get my new card. Kind of a bummer... but I saved a whole lot, without going anywhere. (In other words... I probably bought WAY less than YOU did! Neener neener... and that's how I feel better about not being able to shop this weekend!)
Welcome back to the 12 Days of Christmas Blog Hop (Day Six)! This hop will take place  November 24th through December 5th. Each of us will be posting something Christmas related each and every day at 8:00am, Eastern time (so for my Pacific Time Zone peeps... that's 5am... But don't worry, you can sleep in, and we'll all be here waiting for you, too!)... for 12 WHOLE DAYS! Let us inspire you to finish up that layout, make some special Christmas cards, or wrap that gift in a fun and festive way. If you've already started, you probably came from Barbara. She is so awesome, isn't she? Let's continue this 12-day crafting party!

Alrighty now...  I've said in Day One, I'm starting my portion of the hop with paper things. Things that are simple and easy to do. As with Day TwoDay ThreeDay Four, and Day Five... We are still with the Christmas things meaning all things Christmas! and still with simple [paper] crafts. Today, though... I'm stretching it a tad. We are decorating for Christmas in my house. "What does that have to do with it?" you ask... Um.. My paper craft? It's a PUZZLE! that I didn't put together!!!!

Anyone who knows me, knows I love all things Coca-Cola except that crappy new retro stuff and Polar Bears (even the Coca-Cola ones) should one be decorative (in the home) at Christmastime and Santa Claus. So... for my birthday last year, my friend put together a puzzle for me with my two materialistic iconic loves. Coca-Cola and Santa Claus. Yes, I know it's a really bad picture. Get over it. Since it's Christmastime, I'll even say Please Get Over It. It's not worth it. Really. Choose your battles.
It's fairly large... poster sized. And it came to me freshly put-together. So... I Mod-Podged it. Twice. I love the look of brush strokes (you can't see them in the picture, I tried to capture it, and it didn't work, so my lazy butt gave up on it), so I brushed one way and let it dry, then the other think hashtag, cross-hatching, or whatever your heart desires, so it gave it a canvas-y look. Huh! A puzzle on canvas. Why didn't I think of that! You might think it's nuts, but I really really REALLY like textures, and you can totally get that on your own, by applying in crosshatches, but drying the coats in between so as not to mess up blend the "both ways" strokes. Oh yeah... and then I glued it down to a larger cardboard. Two words. Gorilla. Glue. Love. It.
 
Next up? A frame. Uh. Wow. Even on sale... Michaels, Joann's Aaron's, and other framers cost fortune. Yikes! So... that's where my actual project comes in. Not only were these framers rather expensive, I didn't see a single thing I liked. I wanted regal. I wanted it to look antique and Old World and just awesome. And I couldn't find it. I looked EVERYWHERE! So I begged my Handy Dandy Husband to make me one!
 
I scoured Home Depot, Lowe's, Ace, friends' houses, EVERYWHERE to find the perfect molding. I found it. Scored it at Lowe's. I gave my Handy Dandy Husband the measurements and told him I wanted the corners mitered... He put it all together. And handed it over to ME! There'd be more pictures of the whole process but I was so excited about my project, I totally blitzed on taking them.
 
I glued it on top of the cardboard, so it exactly surrounded the puzzle, with a tiny bit hanging over the edge. Again. Two Words. Gorilla. Glue. Awesome stuff. Let it dry. Duh. Then I used a craft knife yes... because it is such a large surface, I did try a rotary cutter. Um. No. It will not cut at an angle... so the cardboard can be seen from the front of the puzzle. Does. Not. Work. For. Me. at an angle, similar to a mat cut. I wanted the cardboard adhered to the back to fade from view not be completely obtuse or amateur-looking. Got the look. Next?
 
Paint!!! Remember how I said I wanted it Old World, regal, antique yadda yadda yadda? I chose an antique gold and brushed it on after I put painter's tape all over the inside of the puzzle because yeah... I should've painted the dang frame first. Duh. And I'm sure that's what my Handy Dandy Husband was trying to tell me as I took/stole the new frame from him and ran towards the house. He was probably laughing his butt off when I had to go back out to get the painter's tape. I let it dry... Then I "antiqued" it by spraying Walnut Stain (Distress Ink) on it. I let it sit, then rubbed it into all the tiny nooks and crannies of the frame. I let it dry or so I thought and picked it up. The paint I chose was apparently a sealer, too. The stain didn't go "into" the paint and only stayed on top... never to dry..."  And so I rubbed it a tad more, then re-sealed it with another sealer on top of the "antique" look because the antique gold wasn't "antique" enough for me.
Close...
 Closer...
Even closer...
 
With the end result being...
And up on my wall... as we speak. I love it. Even with the minor setbacks of the inability for find what I wanted I feel so SPOILED, the soiled/stained hands, and the having to do more work because my ignorance, my arrogance, and my childlike impatience I didn't listen to my Handy Dandy Husband's words as I walked away with something he'd created for me... It is better than anything I saw ANYWHERE which is really good, because if you remember what I said earlier, I couldn't find it and had looked EVERYWHERE.
 
Since we are decorating, I thought I'd share with you a bit of my treasures...

I love small bits of lighting in a darkened room. So magical... With that, I bid you adieu. Be sure to scan the ads and get ready for Cyber Monday and hope I get my bankcard in the mail on Monday! but be sure to finish up Black Friday weekend with a bang. I'm back to work on Monday, as well... wish me luck. Only 3 weeks to go!
 
Oh wait! There is more in store for you, so hop along and please comment on each and everybody. 'Cause you know we all love a little love... And BE SURE to check out the "other" Lisa, as she's the one with all the blog candy and sponsor info! Have a great time, and don't forget to come back tomorrow!

Here's the Line Up for Day 6:
  1. Lisa P. - http://honeybearzdesigns2011.blogspot.com <==== the "other" Lisa!
 ** Mary - www.scrappintoday.blogspot.com (Guest Designer)
  2. Madge - http://www.thescrappinlounge.com/blog
  3. Ashley - http://marinewifesscrappinlife.blogspot.com
  4. Sandy - https://www.bloglovin.com/blogs/scrapbook-blessings-club-5722003
  5. Elizabeth - http://CraftsByHappyStamper.com
  6. Angela - www.crazy3monkeys.blogspot.com
  7. Alicia - www.goldengoddessdesigns.blogspot.com
  8. Miranda - www.nanasscrapspot.com
  9. Daphne - http://craftyscrapsofstuff.blogspot.com
10. Rhonda - craftingwithblue.blogspot.com
11. Charmagne - http://www.sanurascraps.blogspot.com
12. Barbara- http://barbarab3.blogspot.com/
13. Lisa F - http://lisaslittlerascals.blogspot.com/ <=== You are HERE!
14. Sharondalyn - Http://www.clippingsbysharondalyn.blogspot.com <=== Next stop!
15. Jessi - http://www.mylifeinartsncrafts.co
16. Heather - Http://www.paper-junkie.blogspot.com

Wednesday, November 25, 2015

12 Days of Christmas Blog Hop (Day Two)

Welcome to the back to the 12 Days of Christmas Blog Hop (DayTwo)! This hop will take place  November 24th through December 5th. Each of us will be posting something Christmas related each and every day at 8:00am, Eastern time (so for my Pacific Time Zone peeps... that's 5am... But don't worry, you can sleep in, and we'll all be here waiting for you, too!)... for 12 WHOLE DAYS! Let us inspire you to finish up that layout, make some special Christmas cards, or wrap that gift in a fun and festive way. If you've already started, you probably came from Barbara. She is so awesome, isn't she? Let's continue this 12-day crafting party!

As I've said in Day One (If you'd like to see my "little boy" Christmas Card, just click HERE!) I'm starting my portion of the hop with paper things. Things that are simple and easy to do. Today, I did a Santa Silhouette. It is available in Cricut Design Space. I didn't pay anything additional,  as I am a subscriber (SOOO worth the $9.99 each month to have WAY more access to cartridges I don't physically own, especially for just one or two cuts!).

I enlarged it to fit an 8-1/2x11 paper... and created an oval shape that would make a suitably-sized backing. (I believe this cut was supposed to be vinyl and adhere to a wall or window. But I didn't want that!)
Just a side note! ***And if you see all of my open tabs... you'll see I keep checking on Santa's Reindeer at Reindeercam.com. It's free to view on your computer (which is what I do...) or you can take it mobile and pay $1.99 for the app on Android or iPhone. Just interjecting this here because you can see what I've got open. I'm just too lazy to shut them down and reopen them or find them for the purposes of writing this post.

Did someone say, "Squirrel!"?

I then cut it all out. The Santa Silhouette (the ACTUAL silhouette) and the frame, I cut in black. I had to do this in two steps, as I could not for the life of me get Design Space to change the layer of the silhouette to the same color as the frame. It's a cut file... and sometimes it won't let you do it. Could've been a fluke... I'll never know, nor will I care at this point, as my patience (that I talked about last post and said I had) was kinda gone. Regardless... I did it in two steps (had to move the oval (that was cut inside the frame) all up on the mat to not waste paper after the frame was cut, so the silhouette would be cut from the same color and not waste more paper. Did you understand that? Because it totally made sense in MY head!

I didn't like the little bubble edges on the scallop of the frame, so I contoured them better with my trusty little Cutter Bee scissors. Then it all looked the same and not like an enlarged bookplate with scallops on steroids. I'm ok if it's not perfect...
Time to GLUE! I applied the glue to the black pieces and laid them on, one by one, lining them up with the white oval the best I could.


A little of the white oval was peeking out, when I was all done, so I flipped it over and snipped it off... with my super sharp-tipped Cutter Bee's... Can you tell I l-o-v-e my scissors?
Then I played a little. I'd bought a Wink of Stella pen about a month ago and hadn't ever played with it (or any other) yet. So... I broke out that new baby. And I couldn't figure out how to get it to work. Nothing worked. I looked all over that dang wrapper. I'd opened it from the taped end... and read the back... and there was nothing. NOTHING.  Apparently, when something says "OPEN" and has a pull tab, you HAVE to open it there. The instructions for the Wink of Stella are on the INSIDE of the casing. Duh. So I followed them, and took out the "black ring" after unscrewing the cap, replaced it... and... IT WORKED! I Wink'ed a little Stella on the inside of each scallop... and added a little to the edging of the silhouette, then zig-zagged some on the inside black oval...


And I felt like I still wasn't done.

 
So... I stamped in Distress Fired Brick, "I Believe" and all was good.


I'm totally happy with it. I need a little more practice with the Wink of Stella brush pen, so it's not quite perfect. I love the look with just a little glitter surrounding it all. And I think next time I see WoS's on sale, I'll buy a couple more colors. They are AWESOME!

There is more in store for you, so hop along and please comment on each and everybody. 'Cause you know we all love a little love... And BE SURE to check out the "other" Lisa, as she's the one with all the blog candy and sponsor info! Have a great time, and don't forget to come back tomorrow!

Here's the Line Up for Day 2:
  1. Lisa P. - http://honeybearzdesigns2011.blogspot.com <==== the "other" Lisa!
 ** Carolyn -http://www.grandmacarol46580.blogspot.com (Guest Designer)
  2. Madge - http://www.thescrappinlounge.com/blog
  3. Ashley - http://marinewifesscrappinlife.blogspot.com
  4. Sandy - https://www.bloglovin.com/…/scrapbook-blessings-club-5722003
  5. Elizabeth - http://CraftsByHappyStamper.com
  6. Angela - www.crazy3monkeys.blogspot.com
  7. Alicia - www.goldengoddessdesigns.blogspot.com
  8. Miranda - www.nanasscrapspot.com
  9. Daphne - http://craftyscrapsofstuff.blogspot.com
10. Rhonda - craftingwithblue.blogspot.com
11. Charmagne - http://www.sanurascraps.blogspot.com
12. Barbara- http://barbarab3.blogspot.com/
13. Lisa F - http://lisaslittlerascals.blogspot.com/ <=== You are HERE!
14. Sharondalyn - Http://www.clippingsbysharondalyn.blogspot.com <=== Next stop!
15. Jessi - http://www.mylifeinartsncrafts.co
16. Heather - Http://www.paper-junkie.blogspot.com

Friday, December 2, 2011

Paper Hoarders Design Team Challenge: Christmas Card

Yes... I know... it's been almost a month. No excuses, just no mojo, and no battery... and no... and no... (enough with my excuses already... ON! with the challenge!)

So, last year... at the Day After Christmas Sales... I found myself at Target. Going through their clearance stash and came across a couple of bolts of white feather boa "ribbon" for $1.99, marked at 1/2 off LOWEST price. Ya think they might've miss-marked THAT? And so... me, being the totally frugal hoarder person that I am bought them all up! With a card in mind... for this year...

And it took me MANY challenges to finally DO it!

So here I am, presenting it to you...  I mean... What's more Christmas than a little Santa Claus?

How did I get here?

Here's some things NOT to do:

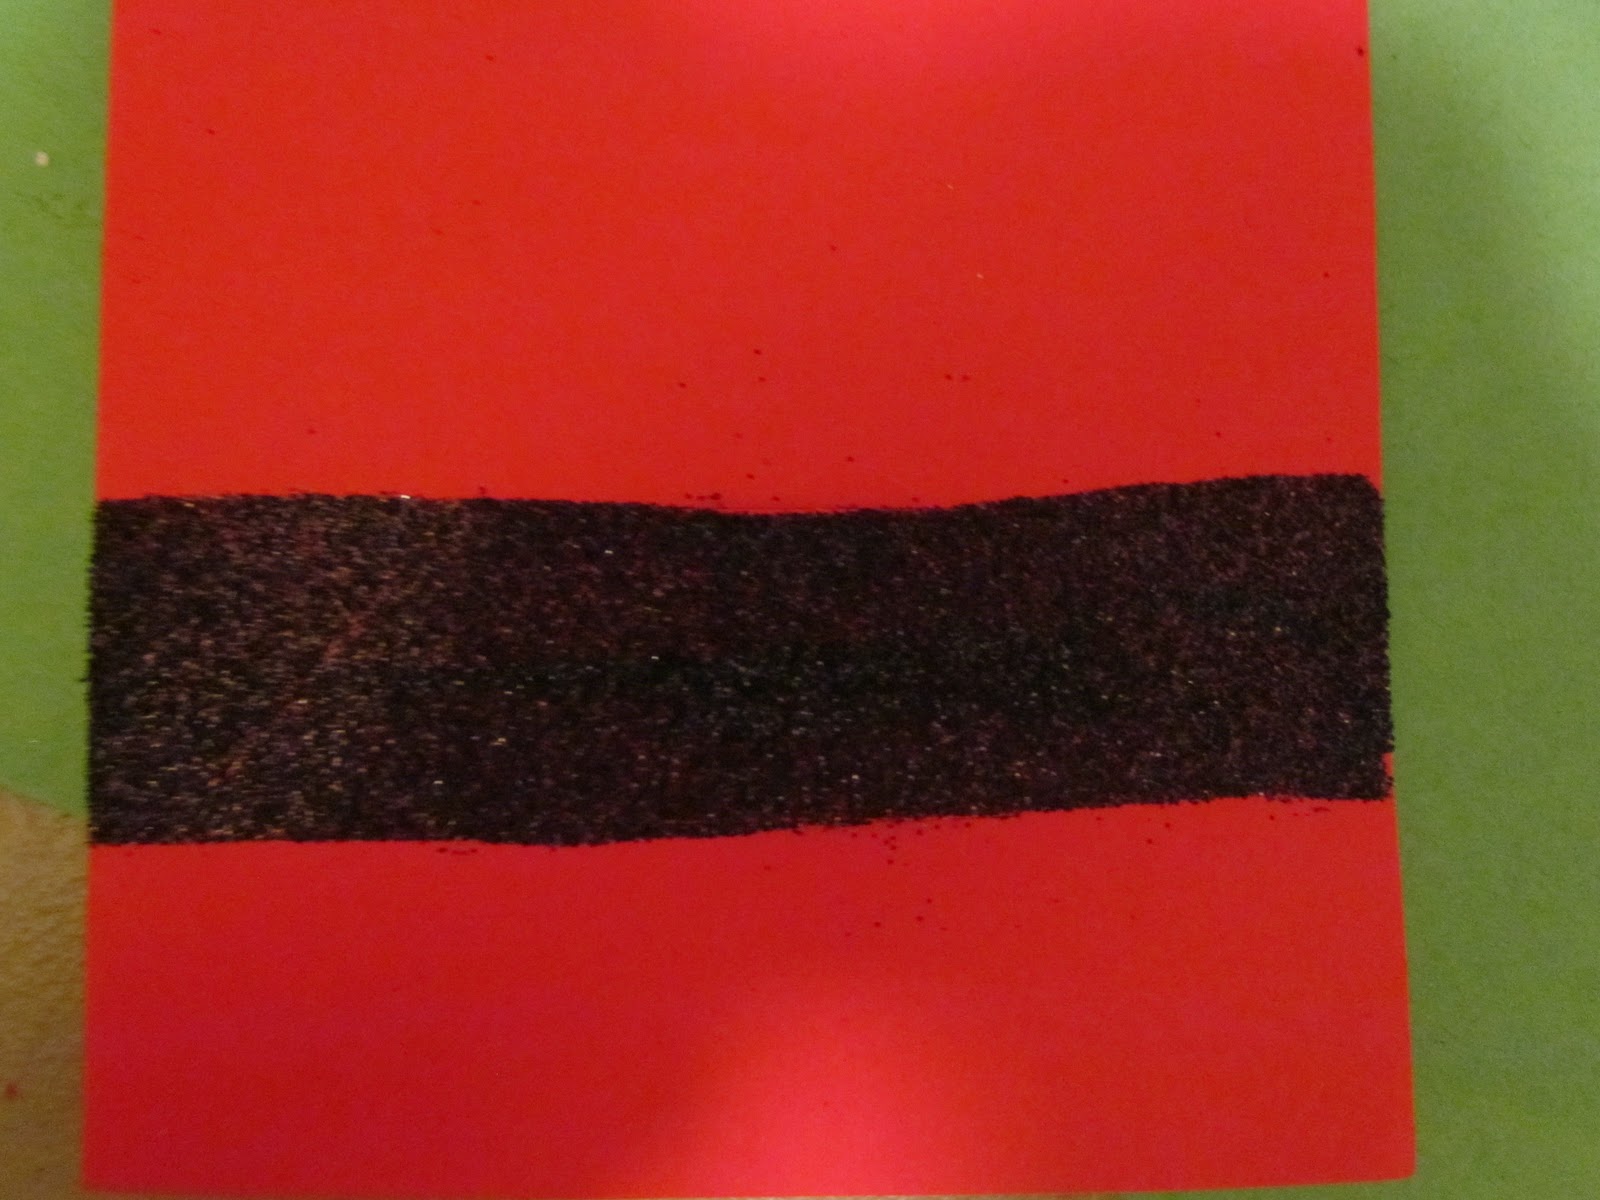
Do not cheat simplify by trying to glitter over the red... it shows through. So, instead, glitter over a black cardstock strip, and you'll be good.

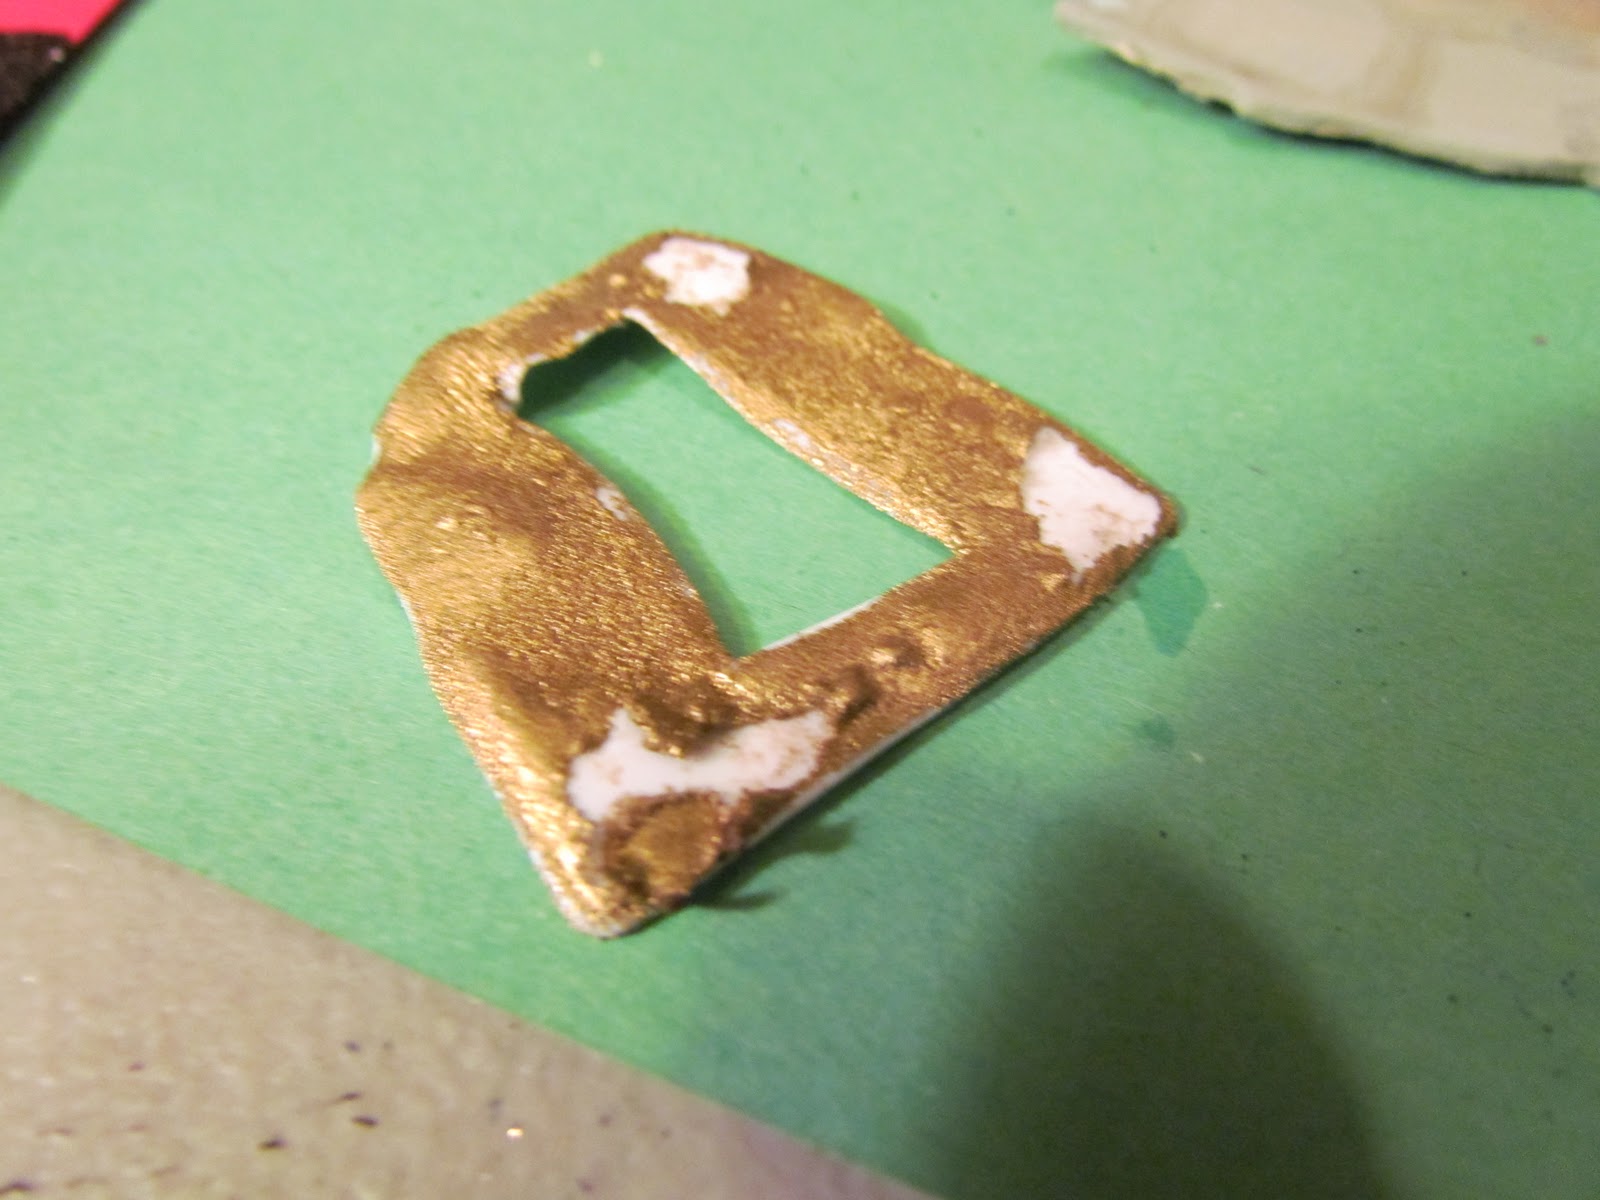
Do not try to heat emboss a plastic slide thinking it would act just like a shrinky-dink to make it look like a belt buckle. It morphs into something utterly at the bottom of a volcano. Ugh. What a mess! And a waste of my precious metallic embossing powder. Instead... Cut the dang thing out of REALLY thick chipboard, instead.

Just another note... when using a really thick "ribbon" like this white feather boa... cut slits to tuck the boa in. DO NOT try putting the belt and the buckle over the ribbon... it makes Santa more fat and bumpy than he really should be...

And another note... DO NOT WEAR BLACK WHILE DOING THIS PROJECT! Unless you want white feather fluff to show all over you... my fleecewear is still recuperating.

Hope you had a fun time and enjoy it! Now... if you want to check out the others for our December Challenge, go on... and go to Miss Tanya's blog! Leave a little love for each of our designers, and join in the challenge, too! Mwah!

Friday, September 16, 2011

It's FEED ME FRIDAY! (Roasted Garlic Hummus Edition)

courtesy of Daphne's California Greek
Whelpers... it's kinda still warm here. And I feel like melting. But... I have a major craving for hummus. Mmm... I really don't feel like driving all the way into Riverside and eating at Daphne's "California" Greek (WHY? did they change the name like that???)

and I really do just feel like pita bread (not to be confused with PITA - pain in the ass... bread) and hummus.

I love traditional. I love roasted red pepper. I love tahini (sesame seed paste). I love it all. And I really, REALLY love garlic. (shhh... don't kiss me!)

Most of the recipes I'd found start with canned chickpeas (garbanzo beans). But... I really don't like the briny-ness. Ew! ... and besides, I have some dried ones in my pantry. Some garlic, olive oil, lemon juice, some sesame seeds and a little oregano... and I'll be good to go. Yum-O!

THIS is the recipe I'm gonna try before I do the above recipe. I'll adjust the seasonings, and tell you how it was!

And fyi (if anyone in my family Santa is keeping my list)... most of these recipes require a food processor. Yes. I have one already... but it's old and dying (it squeaks!). So... to keep things on the quiet side (my hubs sleeps during the day, and heck! I'd like to totally watch my addictive television programs while I'm cooking/prepping... THIS is the food processor of my dreams!!!

It is quiet. It is quick. It is totally awesome. It has THREE! bowls (that all fit inside each other!). It has blades galore! It does everything I've ever wanted to do with food (except cook it, of course!). One disc has an adjustable blade... so YOU can adjust the thickness of a slice, should you want to...

But... it is a Williams-Sonoma exclusive. And... I can't find it anywhere else... for less than $299. Ugh.

My daughter and I love it so much... we're willing to split it as a Christmas gift together? (do I sound desperate?)

So... as I'm pulsing away with my chickpeas and garlic, I'll be fantasizing about this... and what could be... have fun! and if you try it... let me know how it was! Toodles!

Sunday, December 19, 2010

Here Comes Santa Claus, Here Comes Santa Claus...

... right down Santa Claus Lane... (Sing along now!)

I know ya'll know this song! Whelpers... all my kids do, even the older step-kids. It happens once a year. I actually get all of the kids (all 5 of them) together, no matter what the heck their schedules entail or where they might be. I get them all for just a little bit, depending on how long the line at the "Mall Santa" is...

This year, it was NO LINE! I couldn't believe it! AND... it was cute, simple and thank goodness they'd changed the decor! I haven't used my local mall in many years. Years ago, I had the kids' pics taken there, and the Santa suit was red (duh!), the candy-cane poles were mostly red (had a super thin white stripe in them), the chair that Santa sat in was red, and the backdrop was... you guessed it! RED!!!! So... you could barely see Mr. Claus in all of that redness. He looked like a ghostly apparition in the Sea of Red. And let's not forget that most "Christmas" frames have LOTS and LOTS of red in them, too. It was just too overwhelming and I swore I'd never go back.

But... as you may or may not have noticed, it is/was/has been raining here. So, since my step-kids were coming from Los Angeles, and my hubs had to drive them back (yes... they ARE adults - don't ask. It's a long story) in the rain and my steps had "other" things to do and had time constraints on them, "we" decided to go local and I prayed for a Christmas miracle.

First off, I looked and looked all over the frickin' Internet Universe for pics of the set-ups or samples of the Santa Photos at each mall in the surrounding cities. Did you know that while malls may post "information" (very limited, I might add) and possibly hours and NOT prices, they DO NOT have any pics of cute little kids sitting on the Jolly Old Elf? Nada. Nothing. Zilch! So... you/I am just going to have to trust that they have it coordinated better and that maybe some interior designer/set coordinator finally found their calling and fixed our local mall's set-up.  ZOMG! Are you serious? I have to have this super duper anxiety attack happen for what may/may not possibly be OK? Maybe I should take a pill NOW!

And so... we went. Got out of cars (in the RAIN!) and hustled the kids inside. The only ones in line were already getting their pics taken. Woohoo! AND! the set was a mixture of vibrant colors, surrounding Santa in his workshop. Super duper S-C-O-R-E!

The girl elf looked at us and said, "All of them are in the picture?" My reply? "Of course! They're ALL my kids! And they'll be doing this until the little one is 18!"  We took pics and ran out of there. Whoops! We were so quick, I forgot to wait for my pics to be printed, and so I went back... Eek! They had them all in a bag, waiting for me. Sometimes I'm such a dork!

Aren't they CUTE? And hey! so... the border's a little red (I picked a gold-ish frame this year!)
Oh! You're wondering about the adults taking the Santa pic? Yeah... um... I only ask for one picture the entire year. This is the least they can do. It's the closest thing I get to a "family" picture... and this year was the first time EVER that all of them (every single one of them) is actually looking at the right camera AND smiling.  Merry Christmas to me!

Tuesday, December 16, 2008

Too Cute Not to Share (especially with Yahoo having its problems!)


IF A FAT GUY GRABS YOU AND PUTS YOU IN A BAG, DON'T WORRY, I TOLD SANTA I WANTED A GOOD FRIEND FOR CHRISTMAS!

Monday, December 8, 2008

Penguin Bell Project

I love Christmas and the holiday season. Characters abound, big and small... which brings me to this cute inexpensive project from The Tall Mouse. This is one of my fave craft stores. (They even carry Stickles!)

"Someone" in my family adores penguins in particular, so I thought I would share this, today. Penguins can be kept for the entire Winter season, whether you celebrate Christmas or not! Do different sizes and make a whole family of penguins, changing the facial expressions to your liking and making each of them unique to you.
Featured blog of the day? (I know it's been more than a few days since I did this... lol!), but I really would like to feature a Santa Theme today and give kudos to Wanda and her Creative Corner Blog. How many ways can you say "Santa?" Well, Wanda shows us lots of different ways to incorporate Santa into various different crafts and gifts. (She has LOTS of other great stuff, too!) It's time to get busy! And a big THANK YOU! to Megan (from Scrapbook Bingo!) for showing me this site. I am definitely subscribing!!!
Yesterday was cold, even though I was in Newport Beach. The sun peeked out for about an hour. Oh! Ok... maybe not "cold" to all of you, but definitely cold to some of us flatlander Southern Californians! It was breezy and around 62... With me getting wet from the constant splashing of the pool, that equals COLD! But I am now ok and semi-thawed out... lol! It wasn't that bad, and I had wonderful people to work with during the swim meet.
Afterwards, we celebrated John's birthday (Happy Birthday, John!!!) at my mom's (yummy fried shrimp!) and decorated her tree. Marissa (age 3) actually went on the potty chair through-out the day (without me of course!), but at least she is FINALLY getting the hang of it... now if only I could talk her into quitting diapers and wearing panties!!! Gotta run... Toodles for now! lisa

Friday, December 5, 2008

Santa Pop-Up Card

In keeping with the spirit of the season, I'm sharing the activities we are doing... I have a great paper-backed book called My Christmas Craft Book for Kids by Anna Murray & Lynda Watts. I used it when my older girls were little and am using it again... but this time with an adult (or more "knowledgeable") flair. After all, our techniques have advanced quite a bit since 1993...

POP-UP SANTA CARD
Cards that have a pop-up section are expensive to buy, but not that hard to make. Try making several cards, so that you can give one to each friend. Make sure you use construction paper that is firm, not floppy.

YOU WILL NEED:
Blue poster board *
Tracing paper and pencil
Scissors and ruler
Red, green, white, brown, and pink construction
paper *
All-purpose glue *
Black felt-tip pen *

1. On the blue poster board, draw a rectangle 11 inches by 7 inches. Draw a line down the center to divide it in two. Cut out the card and fold it in half.
2. Trace the patterns on page 55 (attached). Turn the tracings over and lay the body pattern on red paper, the beard on white paper, the sack on brown paper, and the chimney on green. Rub over the outlines with a pencil. The images will appear on the construction paper. Cut out the patterns and the slot in the chimney.
3. Using the body pattern as a guide, cut 2 cuffs and a pompom from white paper and a face from pink paper. Glue all the shapes on the body shape. Draw on the eyes with a black felt-tip pen and add a red nose cut from construction paper.
4. To make the roof, draw a rectangle 5½ inches by 7 inches on green paper and cut it out. Stick it to one half of the inside of the card. Cut some extra white paper to look like snow, and glue one piece to the front of the chimney and one to the edge of the green roof.
5. Fold the chimney into shape (at the flat line of the “snow”), and slip the Santa into the slot. Fold a little of Santa’s body down and stick it to the inside of the chimney.
6. Position the chimney and Santa inside the card, as seen in picture. This is how it will look when the card is open. Dab glue on the chimney tabs, then stick in place.
*Notes: I used googly eyes for my Santa's eyes. I also used cardstock and patterned paper for the pieces. My ATG gun was used for adhesive.
If you would like the patterns, please e-mail me and I will forward them to you. Or! If you are interested in the book, please click on the book's link and it will send you to Half.com.
I will post another item a little later...

Friday, December 21, 2007

Takin' a Break from Shredding...


Uh! I've just finished shredding 4 pork picnic-sized roasts... and am now roasting my chickens. I need the break! Tamales are a traditional thing here. We do them every year at Christmas. This year, tonight is the night. Then, with Juan's family, we will have our Christmas party and eat them tomorrow night! Yummy. With some beans, rice, salsa, etc. it is bound to be a great feast. Last year, we introduced the somewhat more American flavor and added a crockpot of chili. Yep, you got it. Some of the more Mexican traditionalists in our family scoffed at the idea, but guess what! It all gotten eaten. Us Americans like to put a little bit of chili (con carne) on our tamale and top it off with cheddar cheese. Totally yum! Anyway, we are doing it again this year.

The picture you see is all of my kids! Clockwise from top left is Juan's daughter (Renee-15), Juan's son (Jr.-18), my daughter (Stacy-14), my daughter (Rey-Rey [another Renee]-13), and our daughter (Marissa-2). No, this is not copyrighted... they took one, and so did I! It's the one "kiddy" thing they will all do for me annually without complaint. They realize (by this time) that they have no choice! They will all change ages within a month-and-a-half after Christmas! They're all getting so big and changing so much. It's extremely hard to keep up with it all. Between school activities and other activities, I'm running all of the time.

Cute tidbit... Marissa was carrying around a copy of this photo. She loves it and all things Christmas. When she took it to her Daddy, she showed it to him and said, "Look! There's Charlie's Daddy!" It took Juan and I a couple of seconds to get it, and Juan started cracking up. Then Marissa told him, "Charlie's coming, too!" If some of you don't get it, my FAVORITE movie (besides the original Gidget and Pretty Woman) is The Santa Clause with Tim Allen. It is so amazing that she has put that in play with reality. She is one smart cookie, and cute, too! It is a great story, but I'm not sure I want to incorporate "Charlie" into the tradition of Santa... hmmm... any ideas?

Whelp, gotta get back to my Crisis Crunch (I'm still the procrastinator...)! Wish me luck! (I may stop by again to take another break...) Toodles for now - lisa