Showing posts with label brayer. Show all posts

Friday, August 12, 2016

Silly Old Bear Blog Hop

If you are here for the Year of Card Techniques (August) Blog Hop, go HERE (or stick around and check out both of my posts for the day! I can be awesome at time, you know!)

Welcome to the 
Silly Old Bear Blog Hop
Thank you for joining us for a blog hop dedicated to everyone's favorite bear, Winnie the Pooh!

You should have arrived from Daphne's Blog. If you need to start at the very beginning,
Connie Can Crop is the first stop in this hop. This is a one-day blog hop, and we appreciate you leaving a comment for all of these amazing crafters.

We have a WONDERFUL sponsor this month!!


One lucky winner will win an awesome digital CD worth £19.99

Be sure to check out their shop online HERE
Visit them on Facebook HERE
What do you need to do to win? Easy... become  a follower of each of the fabulous blogs in this hop and leave each of them a comment letting them know what you like best about their projects.
 
You will have until 10 pm Sunday to finish the hop and leave your comments.
Winner will be announced on Wednesday 8/17/16 at Connie Can Crop.
Be sure to follow everyone and leave a comment along the way!

"Winnie the Pooh, Winnie the Pooh,
A tubby, little cubby, all stuffed with fluff.
He's Winnie the Pooh, Winnie the Pooh.
A willy, nilly silly old bear."

Let's head on it to the Hundred Acre Woods and visit with this Silly Old Bear!
 

And so... I took a lot longer than normal to come up with an idea... I owe lots of people lots of cards, so I thought I'd whittle down that I-O-them U pile. A couple of weeks ago, we had the SCS Junior Olympics (swimming) at Riverside City College (in Southern California). A bunch of us "officiated" (AKA: refereed), and dripped sweat quite a bit. I know... TMI... But dang it! insert word of choice here... It was hot! And during a break, a wonderful lady official went out of her way to go to the store to get all the rest of us... ICE CREAM! What a doll!!!! Then I asked her for her physical address and now she probably thinks I'm a total kook, because she hasn't gotten anything in the mail and she DID give me her address... So... I designed this card with her in mind! (in Cricut Design Space, of course!)

I've totally been trying to use/utilize my scraps! Make the most of them! Save that tree!!!! (and just so you know in case you don't remember me telling you before you can move your cut around on the mat in Design Space before cutting, so the placement is perfect for you.)
All of these pieces, even the teeny tiny ones... will go together to make my card.
OMGosh! It totally sucks when you've been way too busy to clean as you go and your table looks like this and you can't find a thing and you have to use another adhesive than you planned on and it gets so slippery...
This is how little Winnie is getting layered. I am so thankful Cricut artists are thoughtful enough to design in the lines to line up our cuts! Otherwise, I'd flippin' be there for.ever! and still never get a thing done!
And don't believe everything that is demonstrated at a srapbooking show! See that sleeve? It's already lifting up! Soooo... I used my handy dandy brayer to get it all down. Works like a charm...
until this happens and stuff like icecream slides all over the place.
And through it all together and brayer it all together and there she is all together and ready to roll! or get mailed... FINALLY!
A little close-up... Shhh... he's sleeping!

 Up next is there is no "up next"... but you can start at the beginning with Connie, as I'm the last bit. Thanks for visiting, and I hope you enjoyed your time in the 100-Acre Wood. Be sure to comment, and come back again!

And don't forget to check out the this month's challenge at 
Connie Can Crop!!


Connie Can Crop Challenge #49
due 11:59 P.M. Wednesday August 31st
Pacific Time

Tuesday, May 3, 2016

May the Fourth Be With You! Blog Hop

Welcome to the
where we will celebrate all things Star Wars related. Whether it's a card, scrapbook page, party plan or quilt, it's related to the Star Wars franchise in some way and we want to share it with you.

So in a galaxy far, far away there's a crafter working tirelessly to create some movie magic for you...now on with the projects at hyper speed.

There are so many things to wander into and fly into... in the galaxy of the computer. I came across so much more than I had time to do... I started off with a card... submitted the card and hated it. When I looked at the card... it seemed like it took on way too many messages... not that I give a crap about what people think or don't think but messages telling people to take off. Oops. (It was a card with Boba Fett running... And it said says in neon lettering, "May the Fourth Be With You." No biggie, right? Until... you open the card, and it says, "and if it's not... RUN!" Yep. Got a lot of guff about that. Apparently, way too many people are super prickly and take everything personally and apply it to their own personal lives. Gosh. Geeze. People! I didn't intend it for anyone in particular...  And so, in order to avoid unnecessary drama, I pulled it. And here we have something I like much better anyway.

Raise your cups if you like COFFEE!!!! I know I do! and with the new Starbucks app... I like it even more. Took me way less time to get another freebie!!! (I'm not rich and don't spend a lot of my own money there... but I do get a lot of gift cards from people for things I do, and just put them in my account. It makes them go SO much farther!) So, I found this GREAT pin on Pinterest, downloaded one pic (the one I loved more than anything), and pasted it in a Word doc. 4 times.
I'd already tried playing with Adobe... and Cricut... And I wasn't about to "fussy" cut anything. There is no time in my world for that... So I popped it on my Brother Scan-N-Cut 2 sheet, scanned it in and let the Brother cut it all out for me.
See those cuts? So cool...
Ooooh! I'm just lovin' it! I can see you, too... Mr. Hot Stormtrooper!
Again. I'm just so thrilled with this all... not having to edit a cut, and having it cut super perfectly.
And since I make these packet mugs ALL. THE. TIME. better than cards, I tell ya!, I just keep it as a data file in my machine, load up and press cut. I just have to score and apply adhesive, and they're ready to GO!
Martha Stewart makes the best score boards. I love the little one for cards, and take it with me on crops and classes.
All adhere-ed with my 3M ATG gun. I will NEVER give you up, baby!
And yeah... Altogether now... It's just not enough...
So...
I tried some oil pastel crayons I'm not sure how long I've had them or even where they came from... but they were in my stash. Did YOU know they dry up? *cough* ME EITHER!!!! And these weren't going to work for me.
So, I decided embossing, it was! It laid on much better. And then I used my handy dandy brayer... Note to self: Go back to using clear plastic over the project, under the brayer, otherwise it all just STICKS. And then you have to clean the brayer. And who wants to clean anyway? We want to CRAFT! And the lettering stands out better now...
I really like the "froth" in the saying, but I thought someone else might not quite get it... And so...
My own lettering it is! With some white embossing powder. And yes... I did the lettering and sprinkling of powder several times again and again, because I'm that picky with centering...
Ugh. Didn't like this one...
But was "ok" with this one... and now... I just have to throw a gift card or packet of VIA or something in and give them away! They (my secret pals) are sure to LOVE it. And if they don't, they can just give it back and I'll ship them off to a galaxy far, far FAR away!
Which one do you like better? I like the hand-lettered one best... the words pop more.

And remember those wonderful things on the computer/internet I found? Whelp... here's one of my FAVORITES!!!!
 (And look at this FANTASTIC iron on you can get from Giggles to Go! (on Etsy) that I just "happened to find" on my ventures into the Black Hole AKA: The Internet)

 No matter what you like, May the Fourth  be with you... and in case you don't get it (my high school classroom kids didn't last year...) it is a play of "May the Force be with you" Geeze, people!
 
Have a great Fourth! Don't party too hard for the Cinco (de Mayo), and may the rest of May brighten your Day!
 
See ya in another "space" and time!
 
Be sure to comment on each blog in today's hop to be entered into the drawing for a $10 Stampin' Up Gift Certificate given away by our hop host and Stampin' Up Independent Demonstrator Theresa Knopf. 
http://www.stampinup.net/esuite/home/scrapsbygracie/
Thanks for flying by today.
Here's the line-up in case you end up on the wrong planet (I mean blog):
 
Theresa Knopf http://scrapsbygracie.blogspot.com
Alicia O'Bryant http://goldengoddessdesigns.blogspot.com
Sarah Biswabic www.sarahbiswabic.blogspot.com
Holli Pruitt Rodriguez Sunflowerholli.blogspot.com
Melissa Christine http://papershenaniganz.blogspot.com
Amanda Rhodes http://salnclts76.blogspot.com
Lisa Frederick http://lisaslittlerascals.blogspot.com

Friday, April 8, 2016

A Year of Card Techniques - (April) Shaker Cards

Welcome to...
http://scrapsbygracie.blogspot.com/2016/03/a-year-of-card-techniques-march-blog-hop.html

It's month four of our year long adventure into different card-making techniques,
folds and paper crafting products. We hope you got the chance to hop with us in previous months. If not, it's not to late to hop and comment.
If you missed January's hop, you can still hop and comment by starting HERE; if you missed February's hop, you can still hop and comment by starting HERE; if you missed March's hop, you can still hop and comment by starting HERE.

This month we will be creating shaker cards and you won't want to miss the amazing and fun cards we've got for you today.
We really love feedback, so please leave a comment on each of the blogs in today's hop. Each comment on the 12 hops throughout the year will be entered into a drawing for a $25
Blitsy.com gift certificate.

Now on with the projects.


I'm thinking this is my year of do-overs. I absolutely love some of the things I've made, but have given them up to other people as gifts, or even just because I'm that nice. And now... I'm wanting them back to add to my hoarding collection I'm wanting to have more "stash" to be able to give when I need to. But... My inventiveness aka: creativity has been slightly dwindling due to a hectic schedule. Yeah... I know ya'll have them problems, too... so feel my pain together, with me and instead of some "Wink of Stella", we'll be drinking some Rose of Stella.. or Platinum.. I'm not picky (all the Stellas are my friends)! Anyway... Back to my project. I searched through my shaker cards and found this fave... So I remade her with a little Stella in my cup.
 

First... I took searched my shelves for Mod Podge Glitter! NOTE* One of my pet peeves... When someone says, "MODGE" Podge. Do you here the "ge" in the the "MOD" part? Uh... No. (Yes... I got it on clearance quite a while ago at Joann's. Don't judge. Taking THAT back... Do! I'm a total tight-wad and save money every which way I can. Proud of it!) And it comes in quite handy... dries clear (with little flecks of gold glitter)... you'll see... keep reading and scrolling...
Then... I sponge-brushed it on 5"x4" acetate panels (2 of them)... and let it dry... (FYI... I used scraps of plastic aka: acetate that I saved from packaging. Save... SAVE MONEY!)
See? It's all clear now! Well... Kinda... It's a little smear-y looking, but hey... reminds me of those modern showers with the "water-works" in the glass...


Cut out "F A L L" (in Storybook font, without weldin) on a Terrifically Tacky Tape (sheet)... well, what was left of it (it was 3.25"x3.25"). It ran off the edge, obliterating an "L", so I deleted 3 letters from my screen, rotated and moved the "L" to squeeze it onto the leftover bits of the sheet (improvisation at it's finest!) and cut again. Note: Set the pressure higher on a project like this, otherwise you'll do like I did and have to manipulate separation afterward. Fun.
Now... here's the really CAREFUL part. I outlined (on white paper... the one I used as a mat while I Mod-Podged them) the area of the acetate. Then... I centered lines, so the placement of my letters would be just that... CENTERED! I'm sure I really do have some sort of tool that would let this go smoother (and easier), but I seriously did not feel like looking/searching through the craft room. If you must know... it is STILL not organized and is a total mess... STILL.
Then, I super duper carefully peeled the white backing off my letters, and placed them on the plastic acetate, beginning with the center letters, then adding the others to achieve this...
and carefully peeled off the red plastic coating to get THIS... (another note... I placed the white paper underneath ALSO so that bits of things wouldn't cling to the acetate... I love hate when that happens...)
Then... added a little burnt orange ProvoCraft glitter (thanks to goodness to clearance sales from years ago... twenty-five cents keeps on going!!!)... to achieve THIS. (it'd'n't purtee?)
I had already cut out an aperture in a card blank (craft cardstock! one of my FAVES!!!), large enough for my acetate. (btw... I can't find the pics of these steps... sorry...) I adhered the non-FALL acetate to the underside of the card opening, sprinkled in some punched out apples and leaves from various scraps, put adhesive around the edges of that acetate (be sure to adhere the complete perimeter, so that whatever you're putting in your shaker-box doesn't escape through an itty-bitty opening!!!), lined up my FALL acetate, and pushed it down. Another NOTE: I think I'd use my infamous caulking next time, but was looking to not have SO much shaker room...
Then I finished it up, by inking the framed portion of the card with Cat's Eye gold ink and a tad of Wink of Stella (Gold)...
... tied a strip of twine (recycled from a kids' toy packaging! be sure to check out the awesome extras that come with your kids' toys!!!! Remember... I recycle EVERYTHING. This... in a mental-health issue is now called a hoarder. Years ago, it would've been called conservatism and maybe thrifty...  [this held HAIR on a Barbie-type doll!] you'll be amazed at what you paid for and are throwing away!!!) around the card's "spine"... and found these two little leaves (yes... I only had TWO!), pierced a hole in them with a piercer... threaded the twine through and knotted it from behind... 
Really... I am super happy with the total result. You have to look "beyond" the pictures, actually look "through" them to see the full thing. I loved the idea!

Thanks for stopping by... and if you'd like to participate in our technique, feel free and be sure to leave me a link to your project, so I can comment and return the favor!

Hope you have a great "falling-in" with Spring! ... Up next is Kim.

Here's today's line-up in case you get lost along the way:

Theresa
Sharon
Lisa
Kim
Claudia
Denise
Debbie


Friday, March 11, 2016

A Year of Card Techniques - (March) Inlaid Diecutting


If you are here for the Once Upon a Time Blog Hop... please go HERE! (or... scroll up and check out all my posts for the day! I'm kinda great!)
http://scrapsbygracie.blogspot.com/2015/12/a-year-of-card-techniques-march-blog-hop.html

It's month three of our year long adventure into different card-making techniques,
folds and paper crafting products. We hope you got the chance to hop with us in January for the emboss resist technique and in February for ink layering. It's not to late to hop and comment.
If you missed January's hop, you can still hop and comment by starting HERE.
If you missed February's hop, you can still hop and comment by starting HERE.

This month we will be focusing on inlaid die-cutting and you won't want to miss the awesome cards we've got for you today. We really love feedback so please leave a comment on each of the
blogs in today's hop. Each comment on the 12 hops throughout the year will be entered into a drawing for a $25 Blitsy.com gift certificate.

Now on with the projects. (If you'd like to see the YouTube videos that may may not have inspired me/us... Check them out here:
Ok. I'm letting you know RIGHT now... this one was a bit harder for me... First of all... I don't own many dies. (I'm kind of an electronic kinda gal...) So here's what I had to work with:
 
And believe it or not, I picked one of the more intricate (The Butterfly) piece first. Got completely frustrated with all those hecka tiny pieces (you'll see below) and gave up for some simplicity.
 
And so... I chose the star frame. Easy? Not so much.
I went with the above colors...
And tried to run it through my Cuttlebug. Man, I sure wish I had some of that "Post-It" tape... Probably wouldn't have had to do so many tries and waste so much paper! Um... It moves!!!
So after all the sandwiching and passing, this is what I ended up with...
And all these itty bitty pieces...
But, today was a day I really felt like getting all gluey and peeling glue off my fingers. We all need to revert back to being a child once in a while...
And you know you gotta smoosh it around with your finger... Because who DOESN'T like peeling dried glue off their hands? I L-O-V-E it!
Piecing it together... It really is more tedious than it looks...
Like a puzzle... Which way does it go? Yes... I tried several times...
See that itty bitty teeny tiny piece on my fingertip? Yep. I had to try to get it into one of the equally small holes... THE RIGHT WAY! and see...? I'm still letting my finger(s) dry, so I can peel the glue...
THAT's the hole I had to fit it in...
And... just a hint... if you use CRAFT cardstock, run/pass it through several times, otherwise you'll get one of these bits that just isn't cut all the way through. Try that! on for size... major frustration and re-doing...
And some edges stick up... Ugh... Might as well get out my faves... (see below!)
Clear plastic and a BRAYER to the rescue! That's right... roll it all down really tight!
And then we have the above... And that glue still needed to dry...
And um... Be sure you put either some plastic between the layers or something, because otherwise, it might stick together? Uh... Yeah... It's a no-brainer. And I didn't have the brain that day...
So... I wanted to have my Cricut write inside my card... Only...
Design Space wasn't being friendly with the line-spacing... Ugh.
But, I changed it and got it... And then (as I've shown several times before...) I moved it to where I wanted it on the mat (which I had the physical mat loaded with the card... brayer-ed on, of course!).
Note: If you're not sure if it's going to "write" in the "right" place, use the stylus, and it will lightly emboss the path... If that's right, just do it again. Only this time with a pen... Yep!
Watch that baby roll!!!!!
And see? Gorgeous... But not quite enough... See the Wink of Stella I added?
Awww... Beautious! But still... not enough...
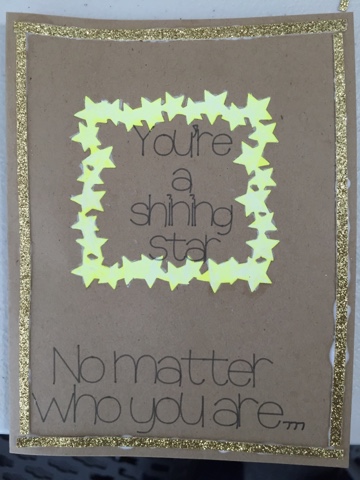
So... Strips of glitter card stock were added and brayer-down. If you don't know these lyrics... and they're not humming through your head yet, ask an "older" person... It's from the '70's!

Hope you enjoyed my simplistic card! I'll try it again... after I get some less-complicated dies. It really is cool!

Up next is Jearise! Check her work out and see what types on in-laying she did! This is pretty incredible!

Here's today's line-up in case you get lost along the way
Theresa
Lisa
Jearise
Kim
Claudia
Denise
Debbie
Sharon